Integrate and configure a camera asset
This guide details the complete workflow for locating a camera in the Assets Catalog, installing it to your project, instantiating it in the solution, and configuring its position for optimal visibility.
Access the catalog
To begin, access the library of available hardware:
- Locate the Scene panel on the right side of the interface.
- Find the Installed assets section at the bottom of this panel.
- Click the Install asset from catalog button.
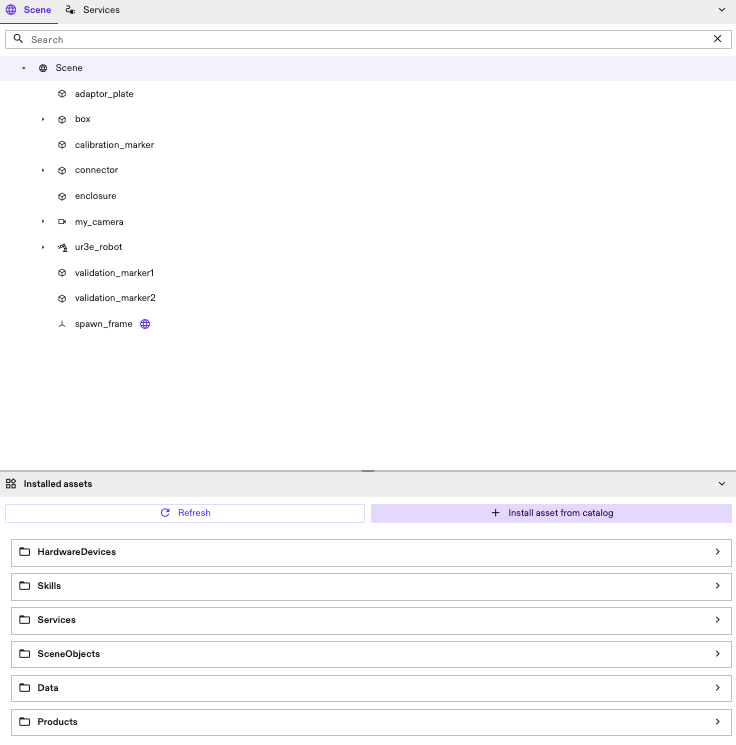
This action opens the Add asset dialog box.
Search for and install the asset
Once the dialog is open:
- Search: Click into the search bar and type "camera" to filter the available options.
- Select: Identify the specific camera model required for your project (e.g., a Basler camera). Verify the "Asset Type" matches your needs (typically "HardwareDevice").
- Install: Select the desired camera and click the Add button.

This downloads and installs the asset into your project's local library but does not yet place it in the 3D scene.
Add an instance to the solution
After the installation is complete, add the camera to the active workcell:
-
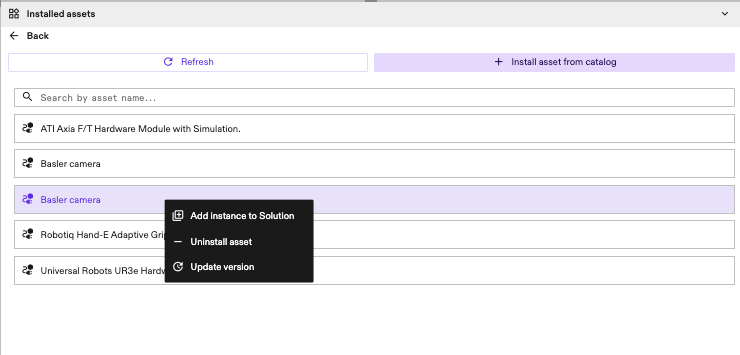
Return to the Installed Assets list within the Scene Panel.
-
Locate the newly installed camera asset HardwareDevice Folder.
-
Right-click on the asset name to open the context menu and select Add instance to Solution.
-
Naming: A dialog will appear prompting for an instance name. Enter a descriptive name for this specific camera and confirm.
The camera will now be deployed into the 3D scene.
Placement and configuration
Upon deployment, the camera usually spawns at the origin ß(0,0,0), often obscured by other equipment. You can position it using two methods:
Rough positioning (visual tools)
- Select the camera object in the 3D viewport or Scene Tree.
- Use the Transform Handles to drag the arrows (move) or rings (rotate) to position the camera in the workspace.
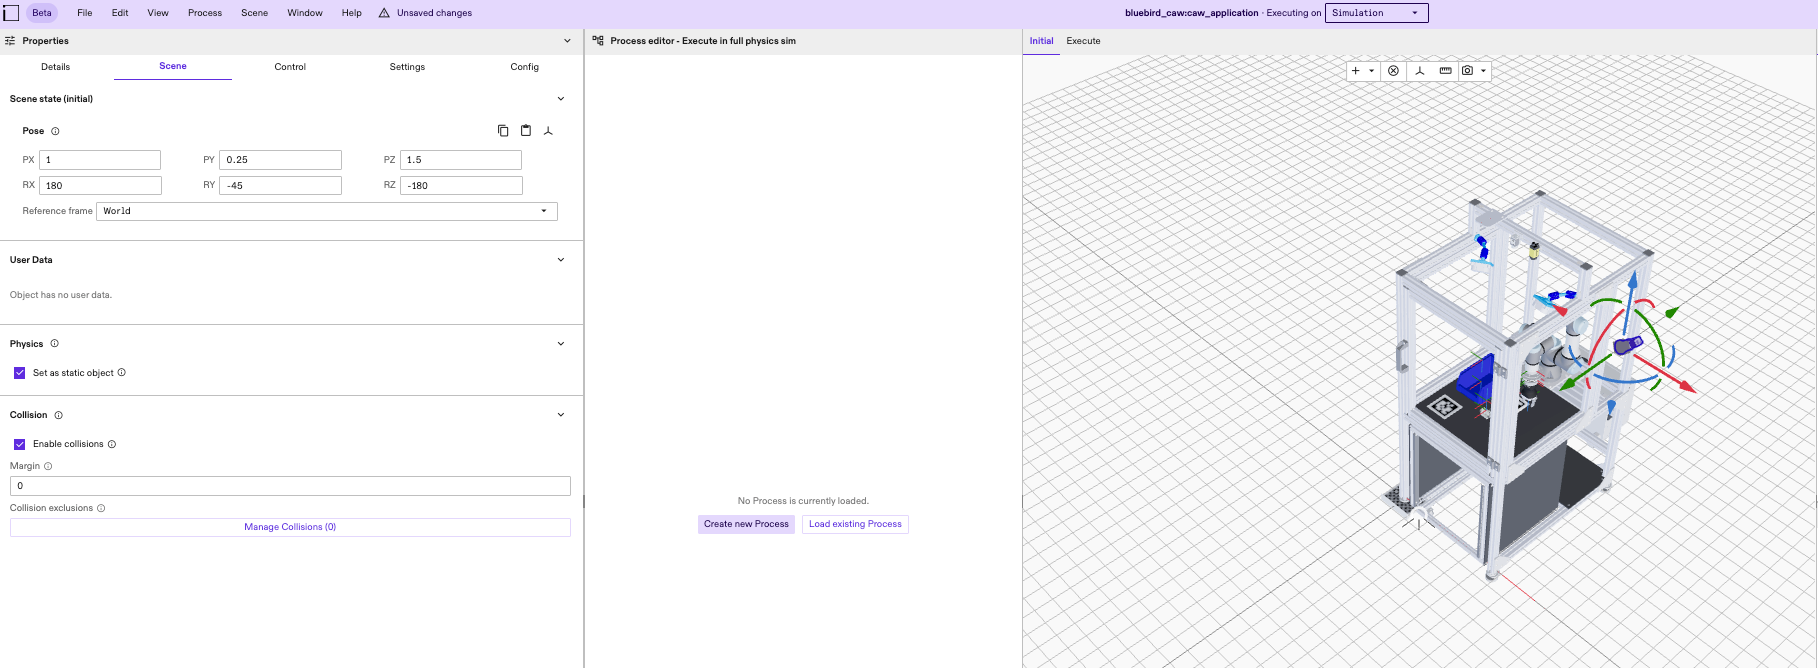
Precise configuration (config tab)
For exact placement relative to the robot or workspace:
- With the camera selected, navigate to the Scene tab in the left-hand Properties Panel.
- Locate the Pose panel
- Manually input precise X, Y, and Z values or rotation degrees.
Camera field of view
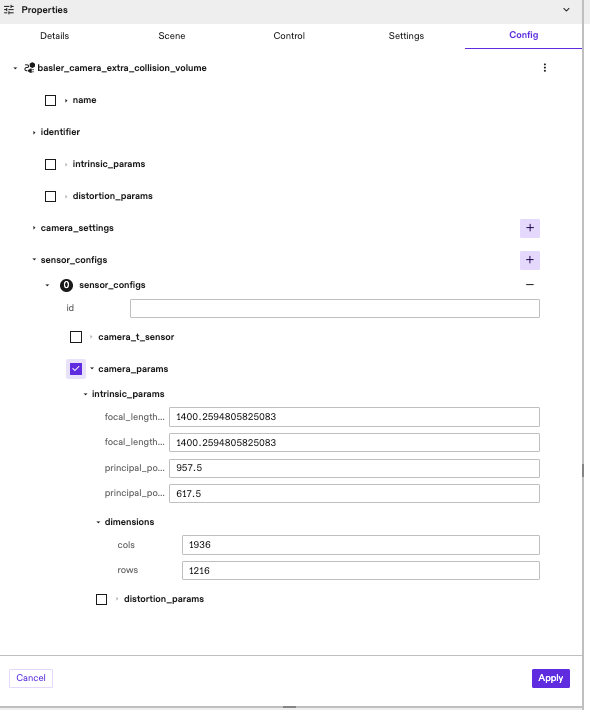
- With the camera selected, navigate to the Config tab in the left-hand Properties Panel.
- Locate the dropdown menu labeled with your camera name and select it to expand
- Locate the sensor_configs dropdown and expand
- Ensure the camera_params checkbox is selected and provide the desired
camera properties
Verify
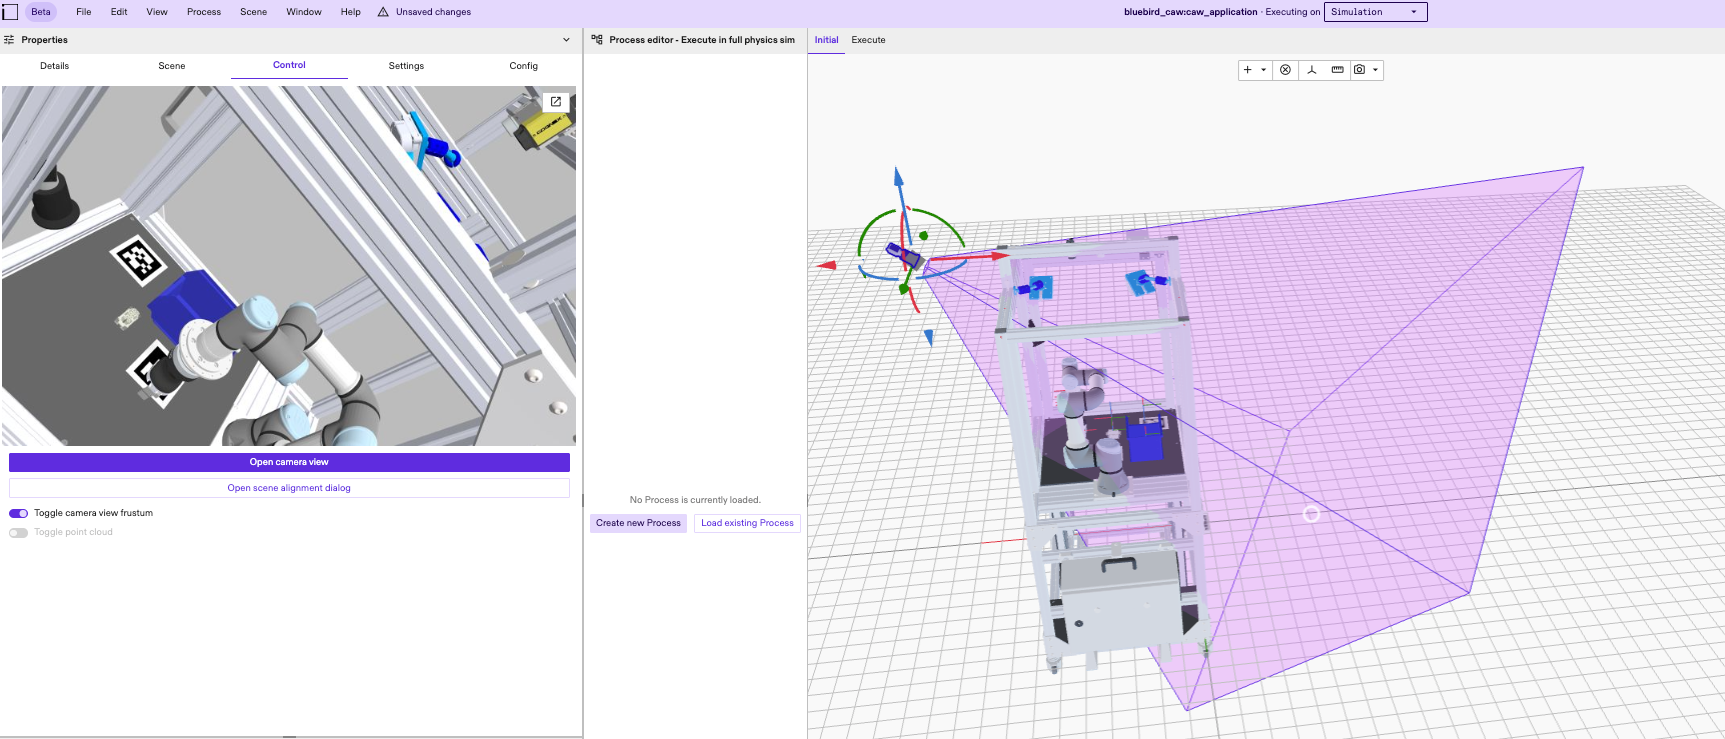
To ensure the camera is correctly installed and functioning:
- In the 3D Viewer, select the Execute tab and click the Reset to initial button to apply changes to the camera
- Select the camera from the 3D viewer or the Scene Tree
- Switch to the Control tab in the left-hand panel.
- Compare the live feed against the 3D viewport to ensure the Field of View (often visualized as a purple cone) covers the intended area and is clear of obstructions.
- Optionally, the view frustrum can be visualized with the Toggle camera view frustrum switch