Create your first Skill
This guide walks you through
- Creating a Python skill,
- Installing your skill into your solution, and
- Running your solution with your skill
Before attempting this guide you must:
Create your skill
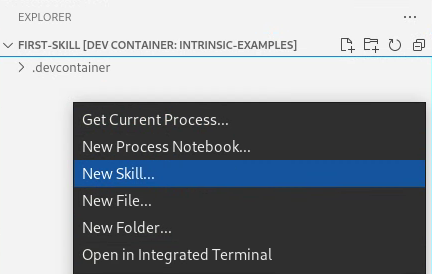
To create a skill, first navigate to Visual Studio Code's (VS Code) Explorer view, then right-click any blank space under the list of files. Click New Skill....
VS Code opens a window at the top, with several prompts.
The fields should be set as follows:
-
When asked to enter the Intrinsic SDK repository URL, input the following:
https://github.com/intrinsic-ai/sdk.git
-
When asked to enter the Intrinsic SDK version, hit enter to use the latest release. If you want to use an older release, then pick a git tag from the list of released SDK tags and enter its name.

-
When asked for a programming language, select Python.

-
When asked to enter a skill ID, input the following:
com.mycompany.example_skill
-
When asked to enter a folder, use the default value of
example_skill. warning
Don't leave the folder name empty! Leaving it empty causes the output files to be generated in the project-level directory, and that could overwrite existing files in your project.
VS Code will display a dialog listing the files it created. Close the dialog and look at the files in the VS Code Explorer view.
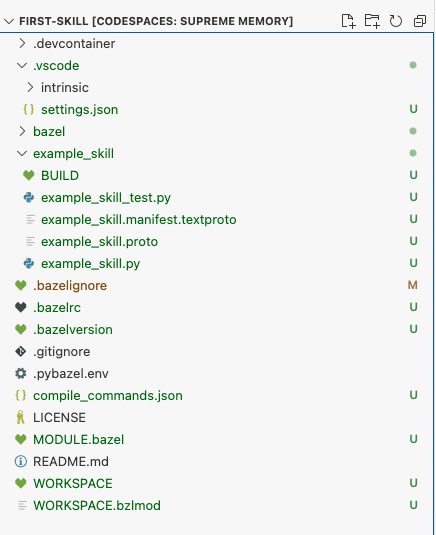
The Intrinsic VS Code extention created two sets of files:
- Files defining a new bazel workspace
- Files defining your new skill
The Intrinsic VS Code extension creates files defining the Bazel workspace only if a workspace doesn't exist already. The files are:
.bazelrc, configures bazel.bazelversion, chooses the version of bazel to useMODULE.bazel, defines the root of the bazel workspacebazel/, has extra configuration files for Bazel
The Intrinsic VS Code extension creates files defining the new skill every time you create one. They are all in the skill folder name you chose earlier.
example_skill/BUILD, tells bazel how to build your skill.example_skill/example_skill_test.py, contains code to test your skillexample_skill/example_skill.manifest.textproto, describes metadata needed by Flowstate to run your skill.example_skill/example_skill.proto, defines Protocol Buffers messages for your skill's parameters and return typeexample_skill/example_skill.py, contains the code that implements your skill
Newly generated skills will log a single message when they are executed.
You can use our skill's examples repo as a guide for your developments. Subsequent guides show how to make your skill do something more useful:
Complete this guide before reading those ones.
Build your skill
Now that you have generated your skill, follow these instructions to build it.
- Open
example_skill/BUILDin VS Code. - Locate the line that says
py_skill(. - Click Build above that line.
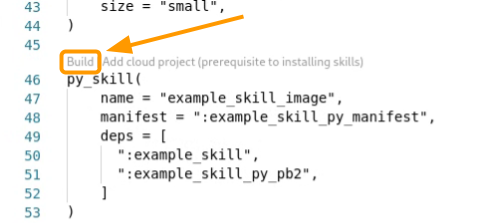
This begins the build of your skill. VS Code will display the output in a terminal window.
The initial build of the SDK and skill may take a long time depending on how powerful your machine is. It can take as little as 5 minutes, or as much as 90 minutes. This is a known issue, and it will be addressed in a subsequent release.
Once your skill builds, you are ready to install it into a solution.
Install your skill
You must connect to an Organization before attempting to install a skill. This includes selecting a target solution.
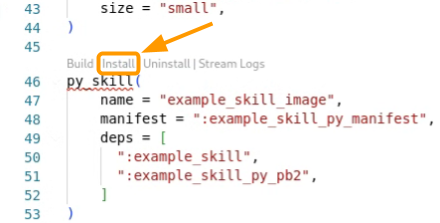
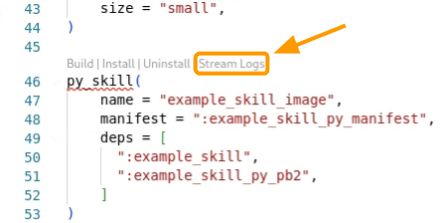
Selecting a target solution causes new links to appear above the py_skill( line.
These are:
- Build, builds a skill
- Install, installs a built skill
- Uninstall, uninstalls skill
- Stream Logs, opens a terminal showing logs in real time from your installed skill
Click Install. Be ready, this process may take a while.
A terminal window in VS Code will show the progress of installing your skill.
Stream logs
Let's make sure your skill is running correctly. Click the Stream Logs button.
Clicking Stream Logs opens a terminal window in VS Code. The terminal displays log messages emitted by your skill.
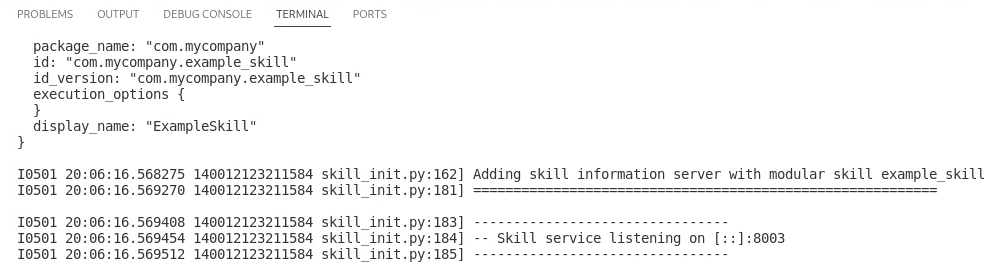
Users who use your skill will be able to see the logs emitted using inctl or the web UI. This can help for debugging, but you should avoid logging confidential information.
You can also use the text logs viewer to access your developed skill logs.
Run the solution
The skill is installed, but running your solution won't execute your skill yet. You must add your skill to the solution's behavior tree first.
-
Open the Intrinsic VS Code extension, and click the Open solution button next to your target solution
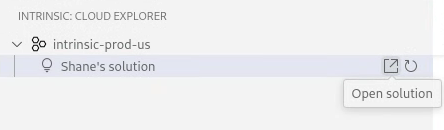
This opens a browser window to Flowstate.
-
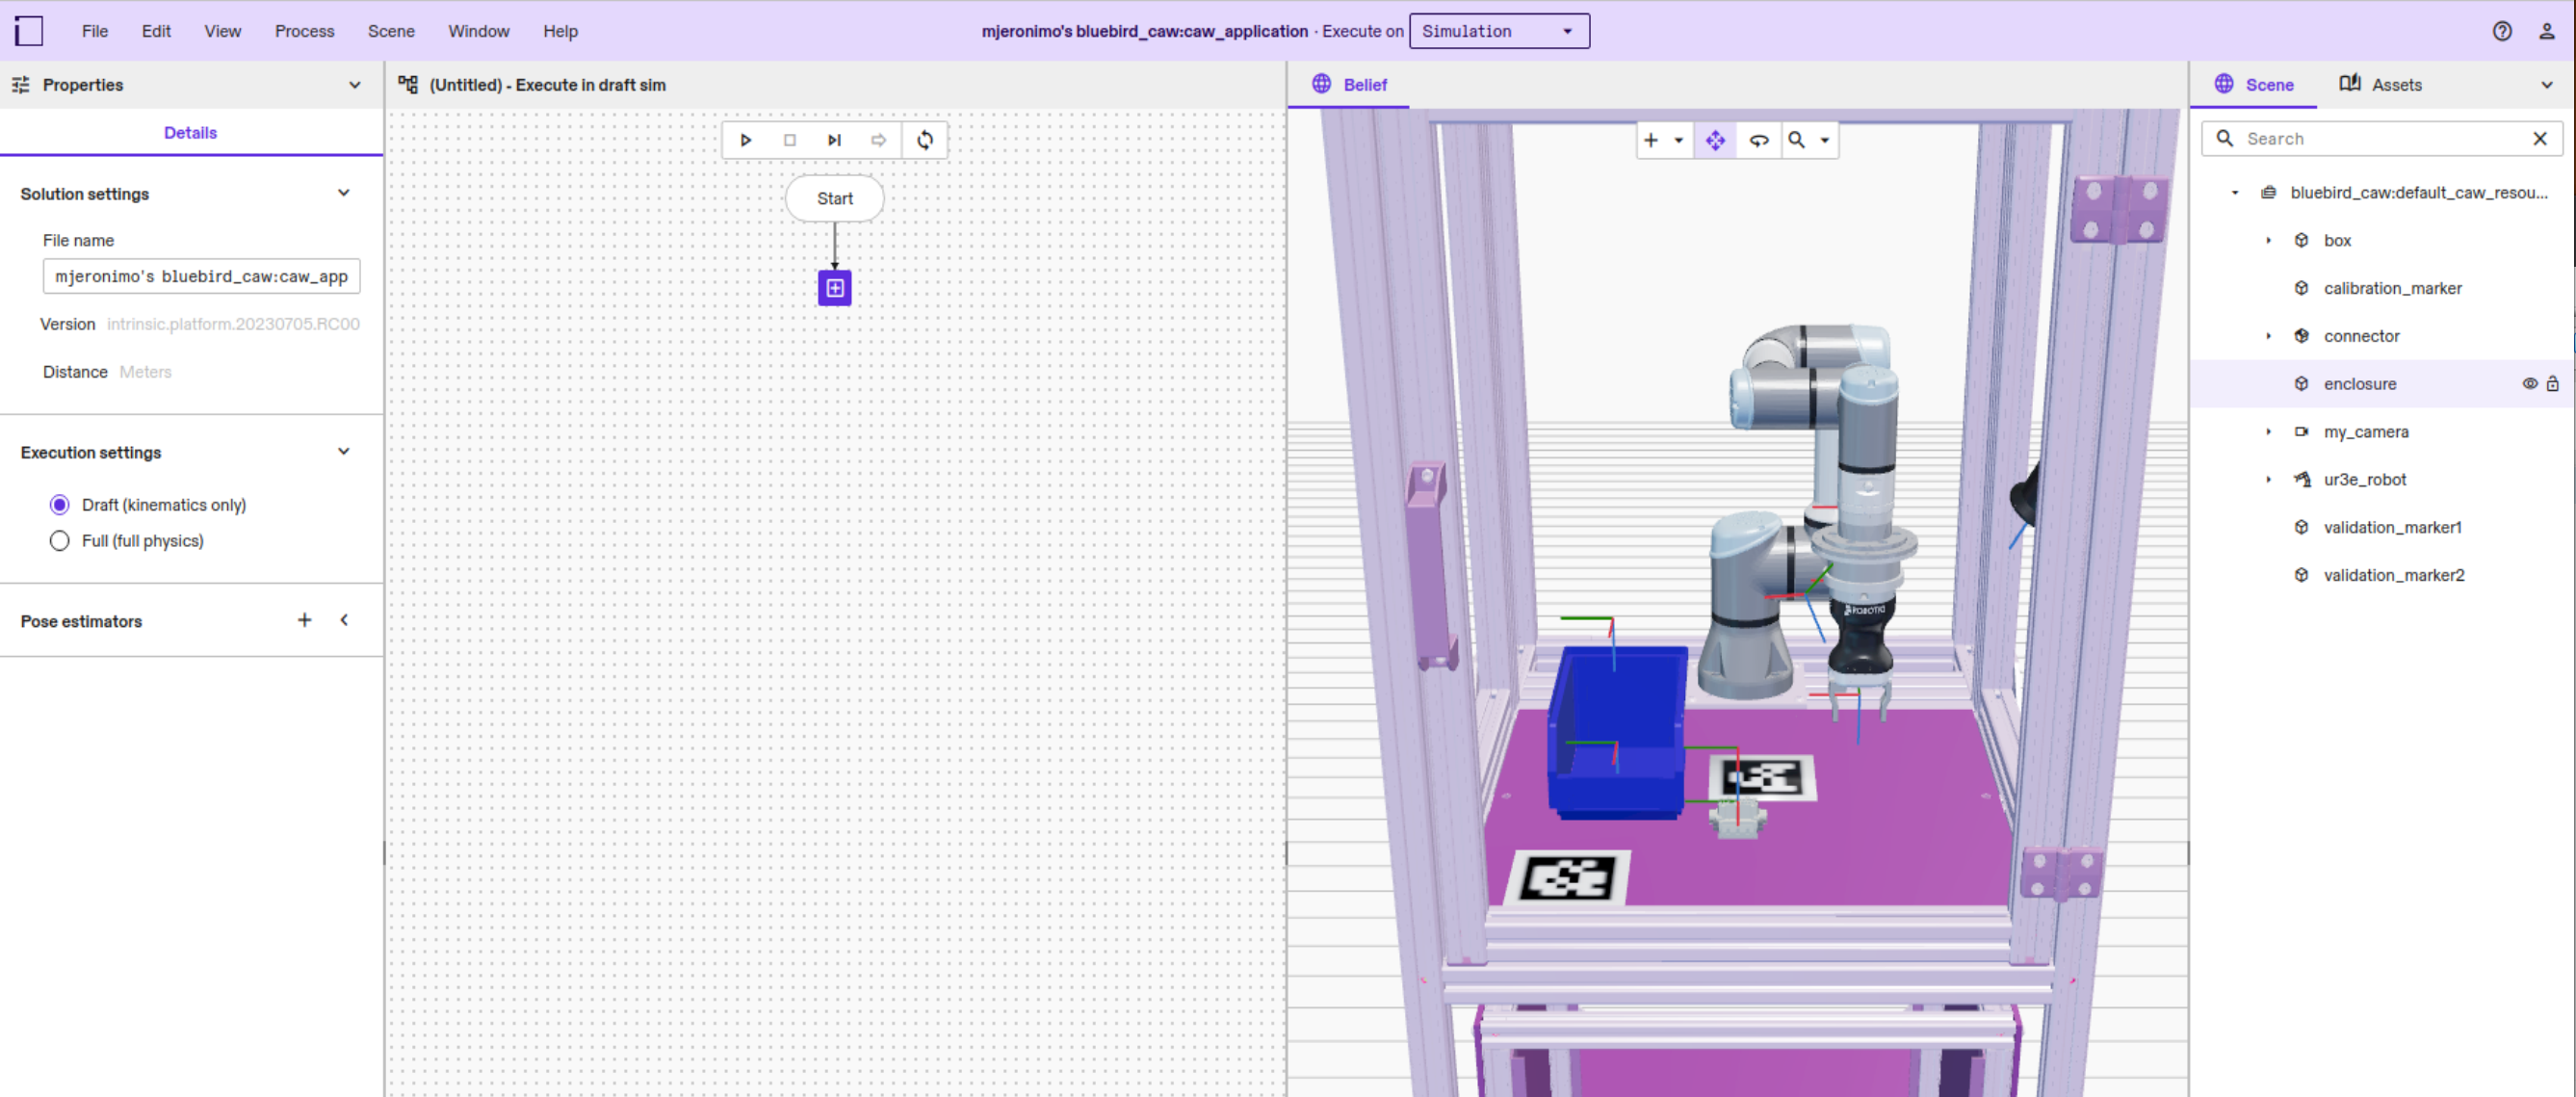
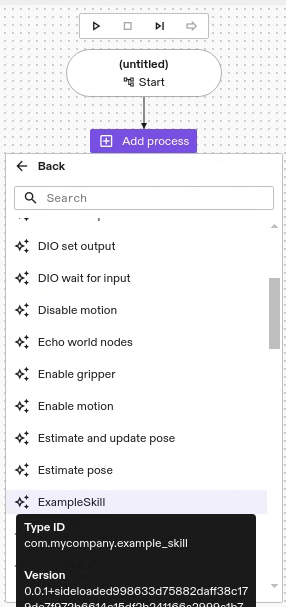
Click the + icon in the Process Editor.

-
Click Skills | ExampleSkill to add your skill to the behavior tree.
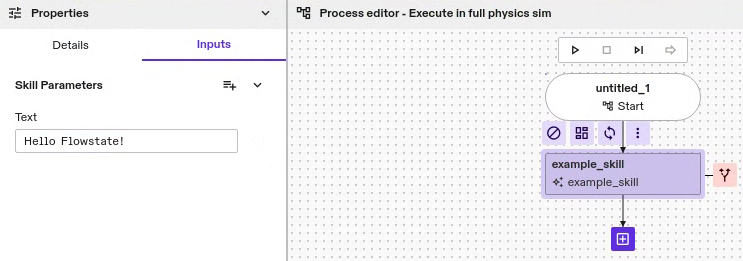
-
Select your skill in the Process Editor, then click the Inputs tab. Put some text in the Text input.
-
Click the Run process button in the Process Editor.
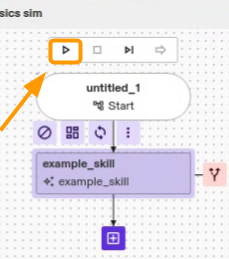
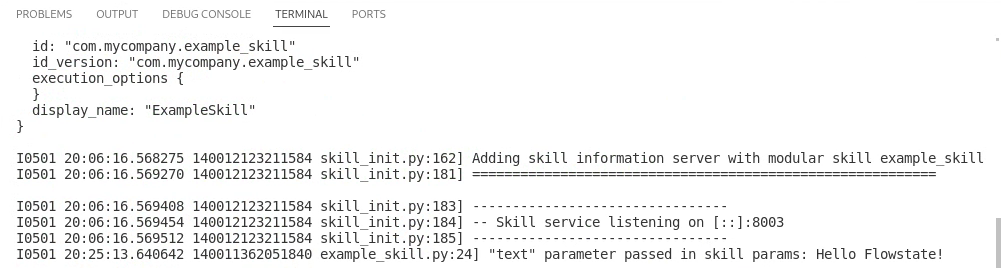
The executive will then execute your skill. If you still have the terminal opened by Stream Logs, the terminal will display the log message from your skill.
Use the Abseil (absl) Logging library
Abseil is an open source collection of libraries. The SDK examples use logging functions from the Abseil Logging Library, which is available in C++ and Python. The log level can be configured to control which levels are displayed on the output.
The following example demonstrates various calls to the Abseil Logging library from Python:
from absl import logging

logging.info('Interesting Stuff')
logging.info('Interesting Stuff with Arguments: %d', 42)

logging.set_verbosity(logging.INFO)
logging.log(logging.DEBUG, 'This will *not* be printed')
logging.set_verbosity(logging.DEBUG)
logging.log(logging.DEBUG, 'This will be printed')

logging.warning('Worrying Stuff')
logging.error('Alarming Stuff')
logging.fatal('AAAAHHHHH!!!!')  # Process exits
The default log level in Abseil depends on whether you're using C++ or Python:
- Python
- C++
The default log level in the Abseil Python library is WARNING. This means that WARNING, ERROR, and FATAL messages will be logged by default.
You can change the default log level using the appropriate functions:
- Use the
absl.logging.set_verbosity()function to change the global log level - Use the
absl.logging.vlog()function to log messages at specific levels
The default log level in the Abseil C++ library is INFO. This means that INFO, WARNING, ERROR, and FATAL messages will be logged by default. You can change the default log level using the absl::SetLoggerThreshold() function.
Please reference the following pages for more information on the Abseil Logging Library