Update your development environment
You must update your development environment when there is a new release of the Intrinsic platform and associated SDK.
If you followed the guide in Set up your development environment and selected "latest" as the tag for your development container image, VSCode will always pull the latest available image as needed.
If you have selected a specific version in your devcontainer.json file, then VSCode will notify you if newer versions are available and prompt you to update the configuration accordingly.
To update your development environment to a specific version, do the following:
Determine the version to update to
Your development environment should match the version of your solution. To determine the version of your solution:
-
Start your solution using Intrinsic Flowstate.
-
After your solution has been deployed, view the solution details.
The version displayed will look similar to this:intrinsic.platform.20250414.RC03.
Notice that it contains a date.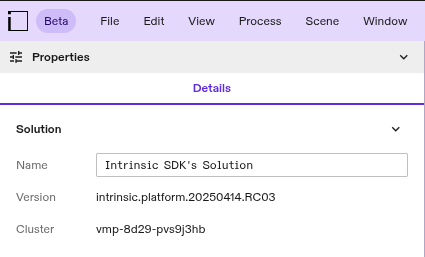
-
Find a tag that starts with
vand contains the same date in the list of releases on the SDK repository. For example, the versionintrinsic.platform.20250414.RC03matches the releasev1.18.20250414.
Remember this release for the next steps.
Update the Dev Container version
-
Open your
.devcontainer/devcontainer.jsonfile. -
Change the value of
imagetoghcr.io/intrinsic-ai/intrinsic-dev-img:TAGwhereTAGis the tag from the previous step. For example, the tagv1.18.20250414corresponds to the imageghcr.io/intrinsic-ai/intrinsic-dev-img:1.18.20250414. Note that devcontainer images do not have avin the version number while SDK versions contain av.
You can check all available Dev Container tags by visiting the GitHub package page -
Save and close
.devcontainer/devcontainer.json. -
Close Visual Studio Code and reopen it.
-
Press
Ctrl+Shift+Pand select the optionDev Containers: Rebuild Container Without Cache. This will update your Dev Container version. In case this does not succeed to update your Dev Container version, you should close Visual Studio Code and reopen it. Then try again.
In a Dev Container, you can always check the current version by running inctl version in the VSCode command line.
Next, update your SDK version.
Update the SDK version
inctl bazel init modifies files in your bazel workspace.
Make sure all code is backed up before following these instructions.
The version of the SDK you use should match your Dev Container version.
Use the same TAG that you used in the previous section.
-
Open a terminal in Visual Studio Code.
-
Backup all files in your workspace, especially the files
.bazelrcandMODULE.bazel. For example, you could backup your files usinggit commit. -
Use
inctl bazel initto overwrite bazel related files in your workspace. Make sure to replaceTAGwith the tag chosen earlier (ex:v1.18.20250414).inctl bazel init --sdk_repository=https://github.com/intrinsic-ai/sdk.git --sdk_version TAG --overridenoteYou can always see the currently configured SDK version when you open the
MODULE.bazelfile and look at the URL specified forbazel_dep(name = "ai_intrinsic_sdks"). -
If you made changes to your previous
.bazelrcfile, then compare the new.bazelrcfile to your previous.bazelrcfile. Migrate any customizations you made into the new.bazelrcfile.noteOnly migrate changes from your previous
.bazelrcfile that were intentionally added by you.noteIf the version you're upgrading to is
v1.11or higher, then make sure your.bazelrcdoes not contain--enable_bzlmod=false. -
If you added additional dependencies to your previous
MODULE.bazelfile, then compare the newMODULE.bazelfile to your previousMODULE.bazelfile. Migrate any additional dependencies to your newMODULE.bazelfile.noteOnly migrate dependencies that were intentionally added to your previous
MODULE.bazelfile.
Your development environment is now fully up to date!
Troubleshoot updates
If you have problems after an update, see these troubleshooting steps.