Manage Solution branches
The Flowstate portal offers the ability to create Solution trees, which allows you to make branches of your Solutions, so that you can:
- iterate quickly on copies of your Solution to test or debug without cluttering your main Solution version history or losing the relationship between branches.
- organize deployments of a Solution under the “main” branch of your Solution in your Solution table.
- copy a Solution version from one branch to another.
- move existing Solution branches into (or out of) a Solution tree.
All of these features are available in the Portal (only).
At this time, Flowstate does not (yet) offer an explicit feature for performing a “diff” or “merge” of Solutions; however, these features are in progress.
Before reading this section, please read the documentation on managing Solution versions because this section builds on the concepts introduced there.
Terminology
- A Solution branch is a single Intrinsic-specific application that can be run on a VM in the cloud or on a robotic workcell’s IPC in either simulation or real mode. In documentation, it is frequently referred to as simply a “Solution”, because earlier versions of Flowstate did not allow for branches of branches.
- Note: in this usage, a “branch” is a noun (thing). The act of creating a branch also commonly results in the word “branch” being used as a verb (action).
- After you create a branch of a Solution, the resulting two branches have following relationship labels:
- Parent branch: refers to the Solution from which a branch was made; this Solution will be located above its child branch in the Solution tree (as listed in the Solutions table in the Portal).
- Child branch: refers to the Solution that was created from the parent branch; this Solution will appear nested under its parent branch.
- A leaf branch is a branch that is not a parent of any other branch
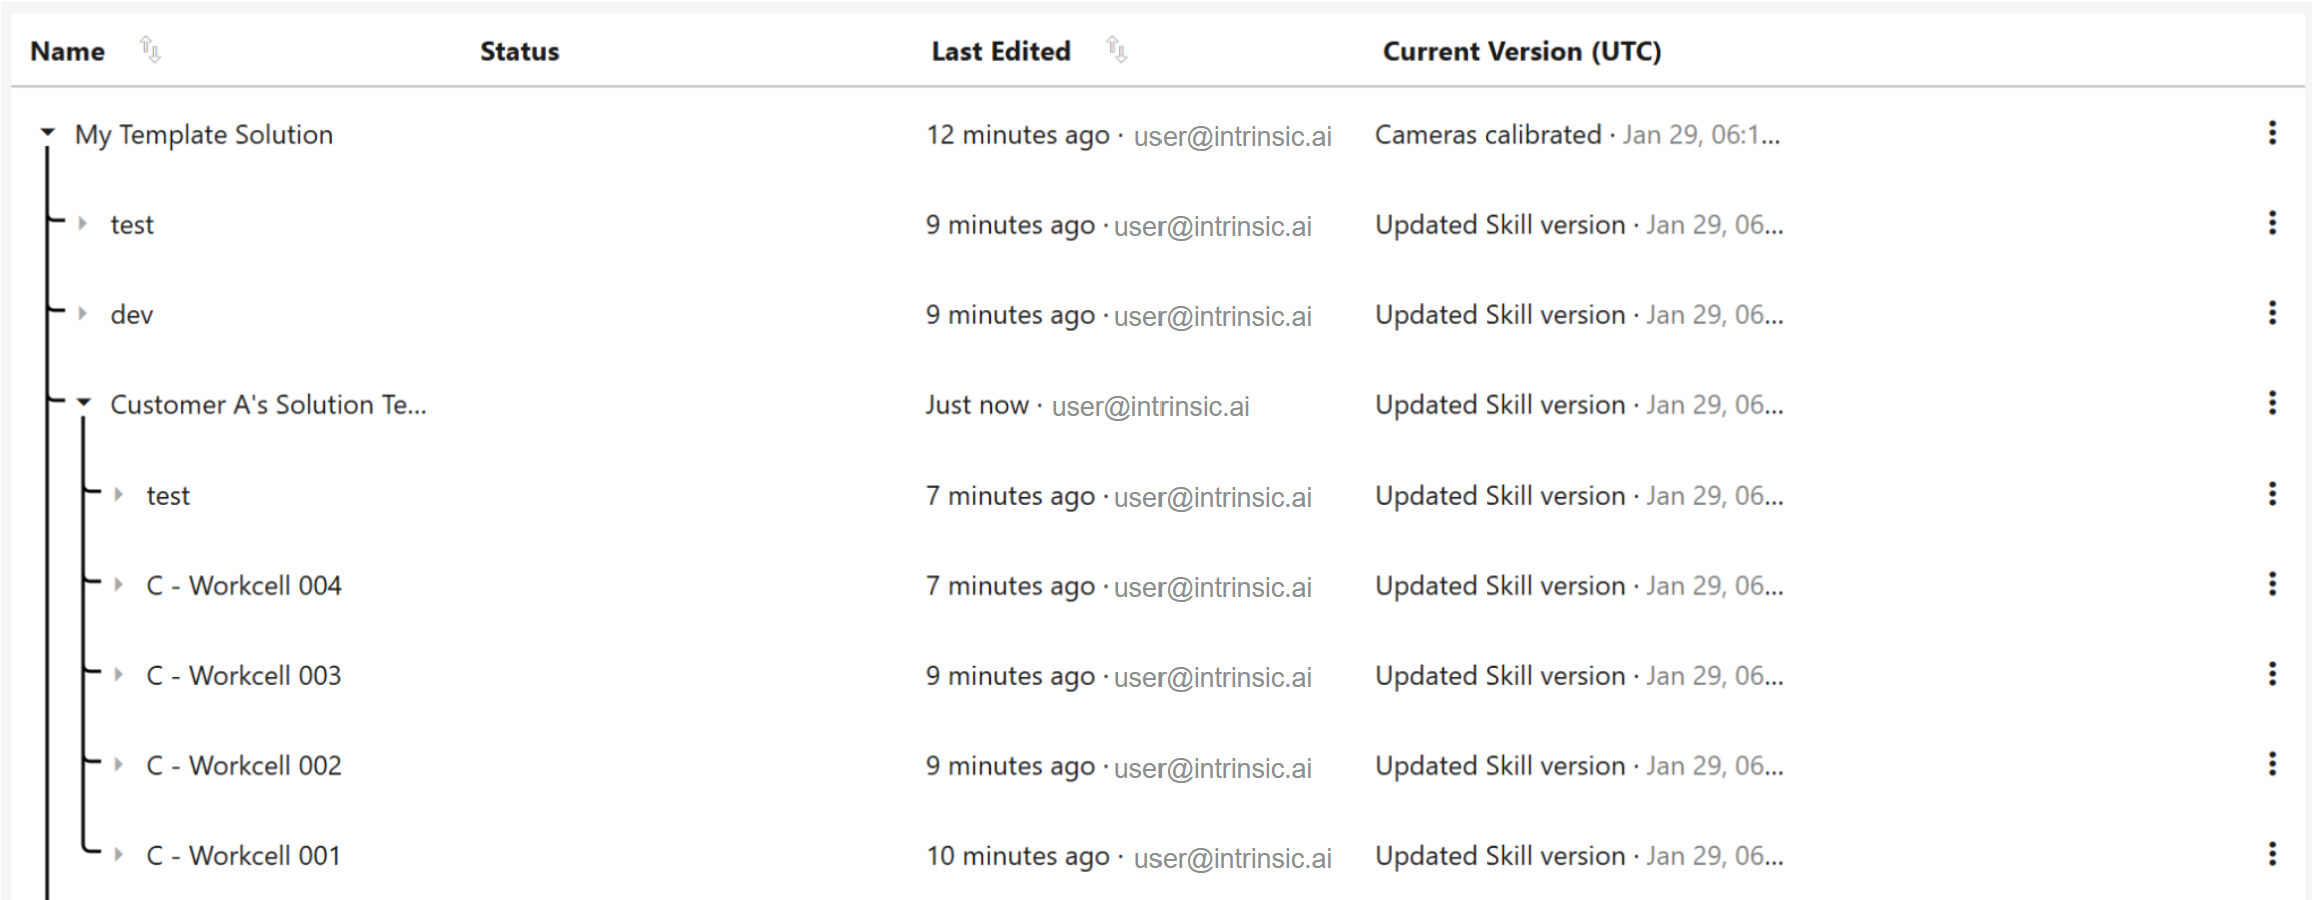
- A Solution tree is a collection of Solution branches that have a shared version history. In the Solutions table, this appears as a main Solution branch and all of its (child) branches, and is visually separated from other Solution trees by a horizontal line.
Example use cases
Below are two example situations to illustrate when a user might want to use this feature before diff/merge is available.
- Testing new hardware
- Jane is nearly done developing a “template” Solution for her customer. She has commissioned a workcell, and is doing final tests on hardware. Her manager then asks her to test out a new gripper, to see if that would work better than the one she’s currently using.
- Jane needs to commit multiple versions while testing a new gripper, without cluttering the template's permanent version history. By creating a branch, she can maintain a clean primary history while preserving her experimental commits.
- Jane creates a branch of her template Solution, based on its current version. In the test branch, she swaps out the gripper, and tests it out, committing several versions as she works. Because she had already commissioned her template Solution on hardware, she can simply launch her test branch and run it in “real” mode on the workcell’s IPC, for hardware testing.
- Jane now has options:
- If Jane decides that the new gripper doesn’t work as well as the original, she can simply delete (or ignore) the child branch where she ran this experiment, and go back to working on her template Solution branch.
- If Jane decides that the new gripper is better than the original, she can copy the working Solution version from her “test” branch back to her ”template” branch and continue working from there.
- Deploying a Solution to multiple workcells
- Jonah has developed a “template” Solution for his customer, who wants to order 5 workcells that run the same Solution.
- Jonah can now create 5 branches of his template Solution, one for each workcell, without having to launch the Solution Editor until he’s ready to commission a workcell. Having the deployments as branches of the original “template” Solution creates a clean, hierarchical view, nesting all related instances under a a single Solution tree. Note: Jonah will still have to commission each workcell manually at this point in time.
Create a Solution branch
- To create a new branch from a Solution:
- Locate the Solution: In the Solutions table, hover over the Solution you want to branch. The row will highlight in purple.
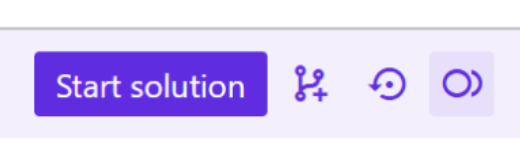
- Access the Actions: On the right-hand side, look for the action bar.
- Select Branch Action: Hover over the first icon (the Branch symbol). The UI will display a preview of where the new branch will be placed in the hierarchy.
- Create Branch: Click the button to confirm.

- The “Create new branch” dialog will appear. Add the name of your branch, and then select which version of this Solution you want your branch to start with.
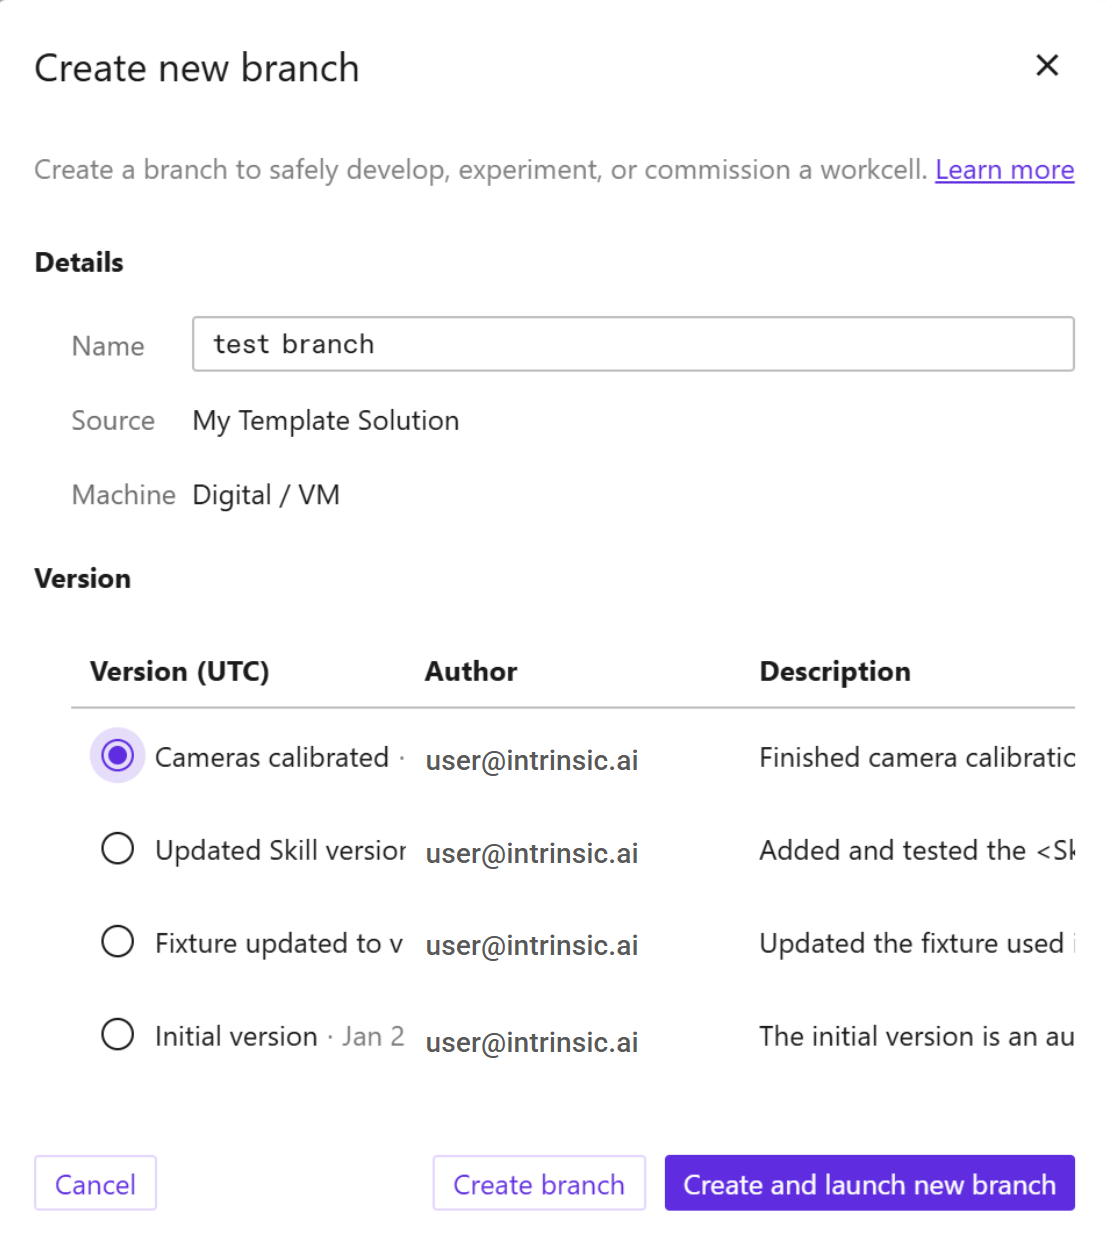
- Finish creating your branch:
- If you want to immediately launch this branch to work on it, click Create and launch new branch.
- If you don’t want to run the branch immediately, click Create branch.
View information about a Solution branch
To see how a branch is related to its parent branch(es), hover over "Current Version” in the Solutions table in the Portal. A tooltip will appear showing the commit graph, illustrating the Solution’s relationship to its parent branch(es).
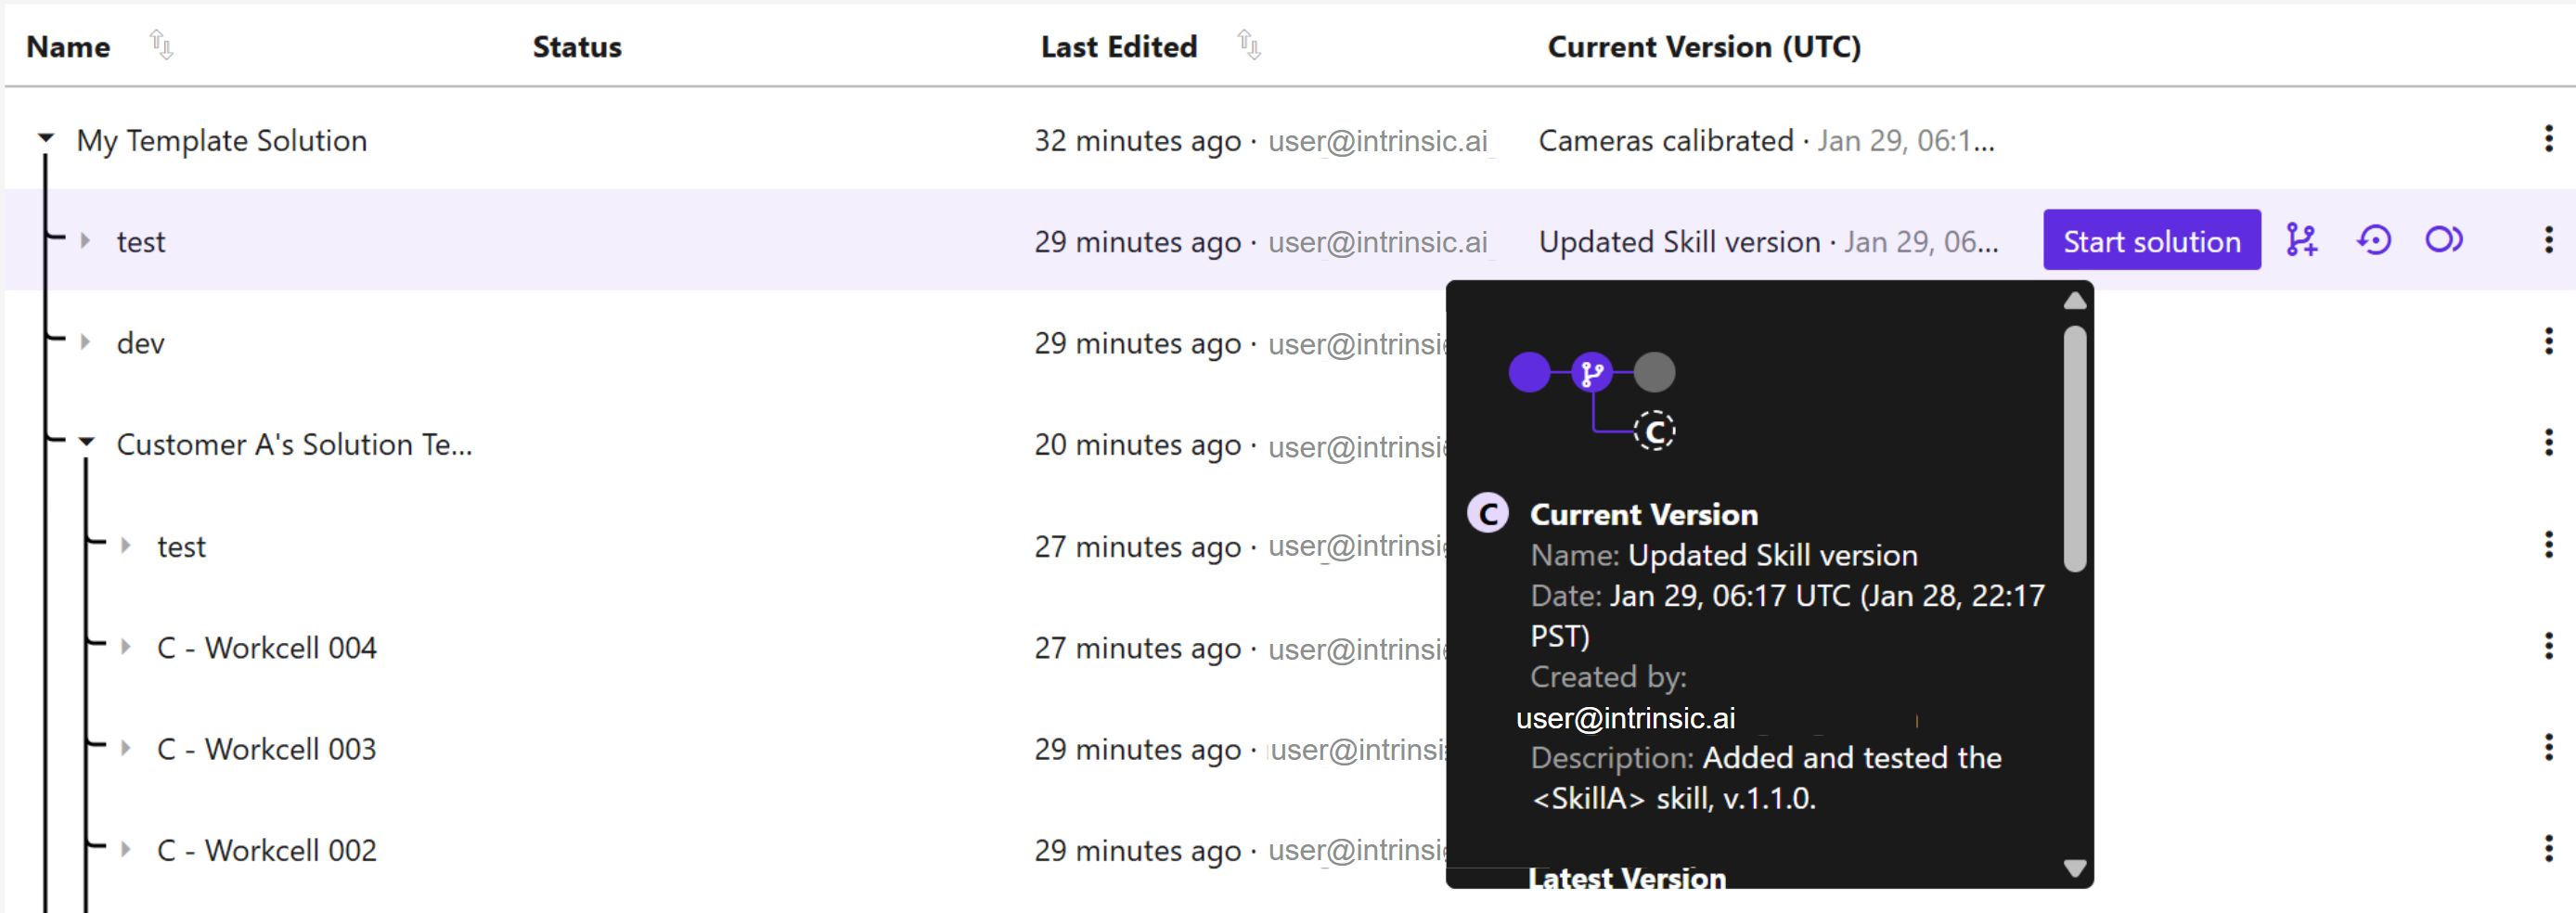
Along with the commit graph, we also show metadata for the following 3 versions (where applicable): version name, timestamp when it was committed, who committed that version, and the version’s description (if one was added).
- Current version: the current version of a Solution is the committed version that you are currently working on. The current version is only different from the latest version (see below) when a user restores a previous version of their Solution.
- Latest version: this is the last version of the Solution branch that was committed. If you think of the Solution’s version history as a series of snapshots: the latest version is the last snapshot in the line.
- Branch source: if a Solution is a branch of another Solution, then we specify which version of the parent branch was used to start this Solution’s branch. If the Solution is not a branch of another Solution, then this entry will not be present.
Reparent a Solution branch
The “reparent” feature in Flowstate enables users to take one Solution branch and parent it to another. Users can reparent a branch within the same Solution tree, or move a Solution branch into or out of a Solution tree. Reparenting a branch within a tree is the most typical use case for this feature.
Reparenting in Flowstate is an advanced feature, and we recommend that it be used with caution, particularly when moving a branch across trees. The cross-tree functionality is designed to help existing customers migrate standalone solutions into a structured tree format. We recommend that an experienced developer perform that migration all at once on behalf of their Organization.
When two Solutions that do not share version history are added into the same tree via “reparent”, the branches are assumed to intersect all the way back at the “blank” Solution, which is assumed to be the starting point of all Solutions, even if it is not called out as an explicit committed version (e.g., if you start a Solution from a Solution example).
To reparent a Solution branch:
- Select the Solution’s three-dot menu on the far right of the table
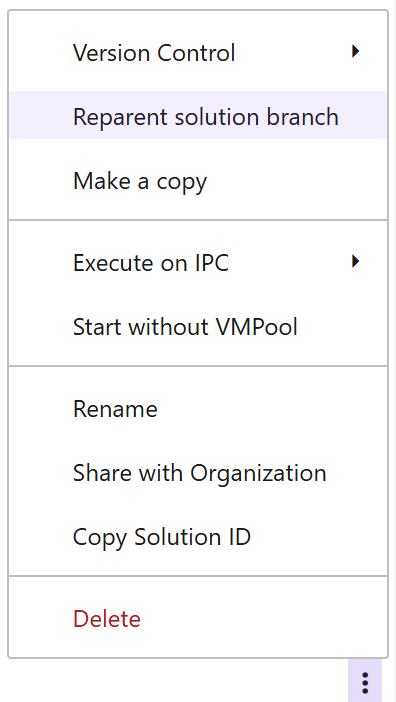
- Select “Reparent solution branch”.
- Select the Solution that you want to have as that branch’s new parent, from the “New parent” drop-down menu.
- To move a Solution branch into its own tree, select “Set as its own version branch (Root)”.
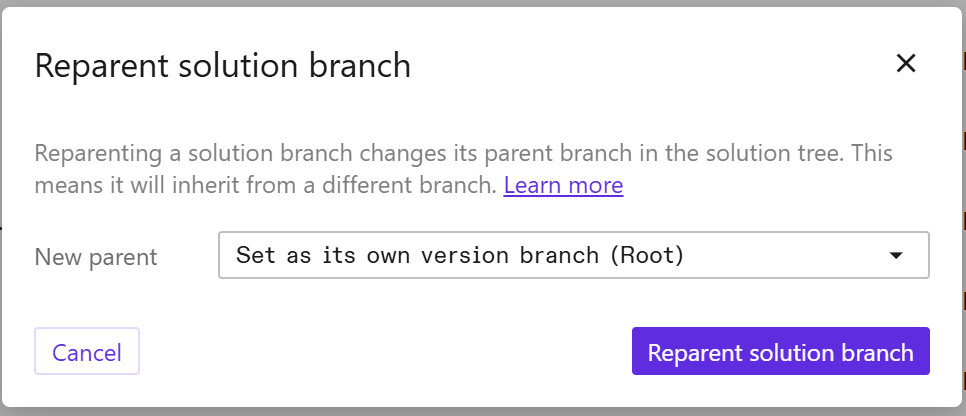
- Click Reparent solution branch.
- The Solutions table will refresh, and a toast will confirm that the branch was successfully updated.
Sharing Solutions and visibility
All Solution branches are initially private when created. Whether a parent branch is shared (or not) is not inherited by its child branches. To share a branch, see Share a Solution.
When a child branch is shared but its parent is not shared, then other members of your Organization will see the child branch as a separate Solution tree, in order to protect the privacy of the parent branch. If the parent is later shared, then it will appear as the parent of the child branch.
Copy a Solution version
There are two main functions for copying a Solution version:
-
Create a new Solution tree See Create a new Solution. This creates a new Solution tree whose initial version is a copy of the selected version. The new tree does not retain a relationship to the Solution it was copied from.
-
Copy a Solution version from one branch to another This action appends a copy of a single Solution version to the end of another Solution branch’s version history, and sets that as the (destination) branch’s current version.
- Hover your mouse over the Solution whose version you want to copy. Click the 3rd icon button (from the left), which has the tooltip “Copy version to another branch”.
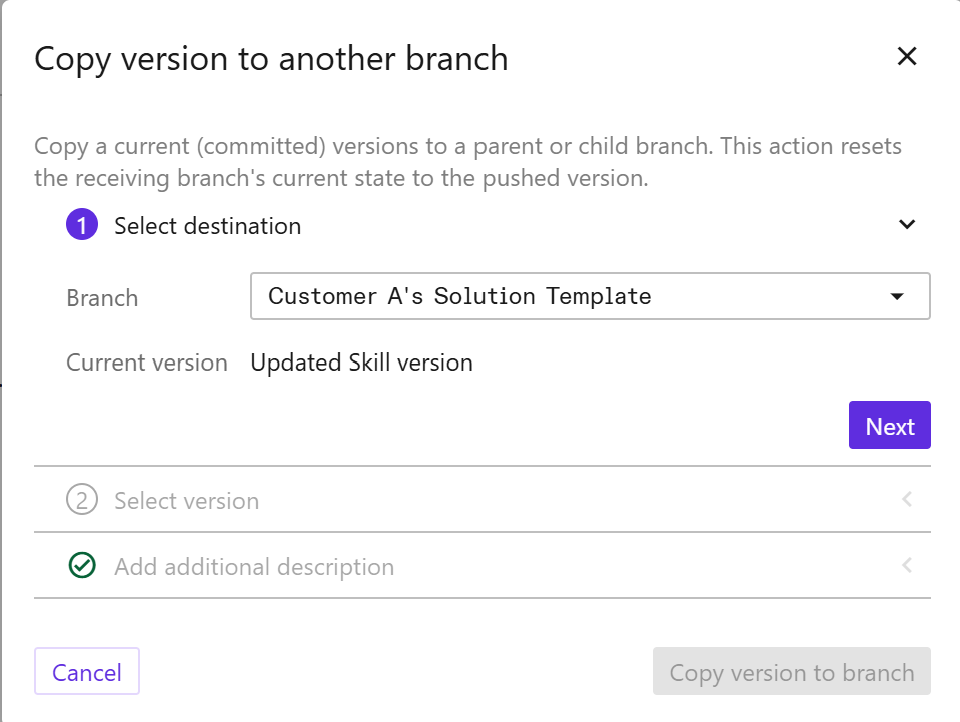
- Select destination. From the drop-down menu, select which Solution branch will receive the copied version. The dialog will show the current version on the destination branch, to give further context in case many of your Solutions have similar names. Click “Next”.
- Select version. You can then select which version of the selected Solution you want to copy (to the destination branch). Click “Next”.
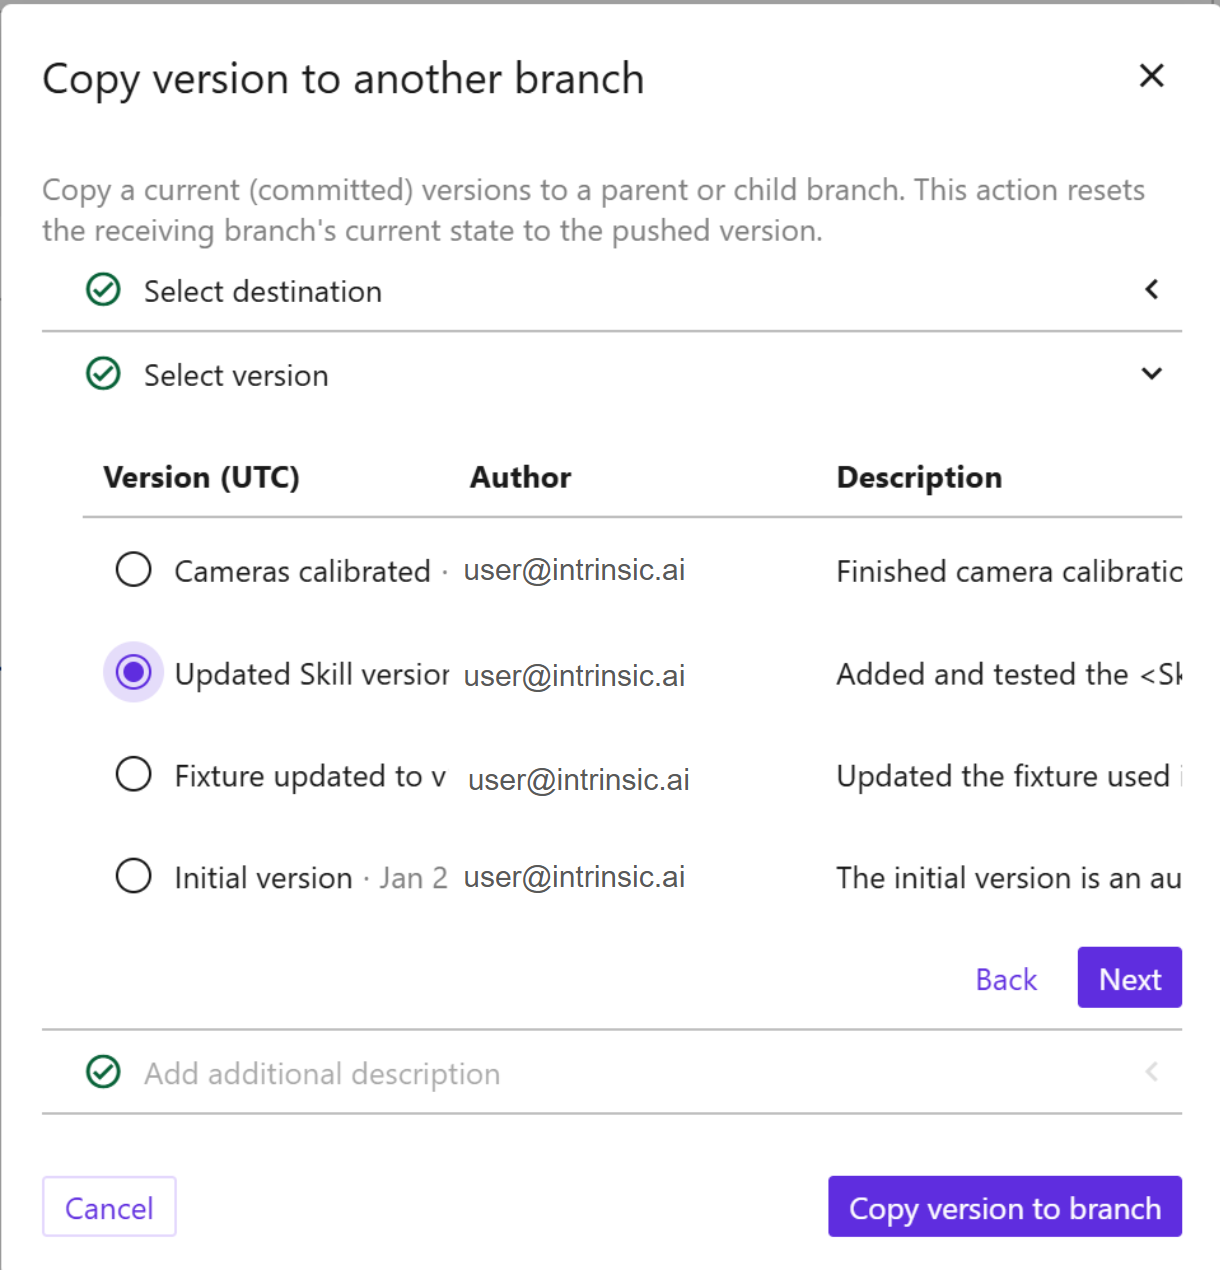
- Add additional description. As a convenience, the “description” field will be pre-populated with the message “This version has been copied from another branch”, followed by the original commit description for that version. The description field is editable, so you can easily replace that message with another. The description field is technically optional in that it can be blank; however, we recommend that you enter a description.
- Click “Copy version to branch”.
Delete a Solution branch
See Delete a Solution. Note that you can only delete a "leaf" branch.