Plan a grasp
The skill plan_grasp plans, but does not execute a grasp. To plan and execute grasps in a single skill, use the grasp_object skill.
The plan_grasp skill wraps the various steps of grasp computation and selection:
- Extract the set of relevant object poses from the passed-in belief world.
- For each object, propose a set of candidate grasp poses.
- Score these candidates based on a set of heuristics.
- Pick the best ones and return them.
Add a product reader service
If a product reader service has not been added yet, add it by following the guide. The product reader service allows you to access the product data needed to create a WorldObject within a skill. Refer to the product reader doc for more information on the product reader service.
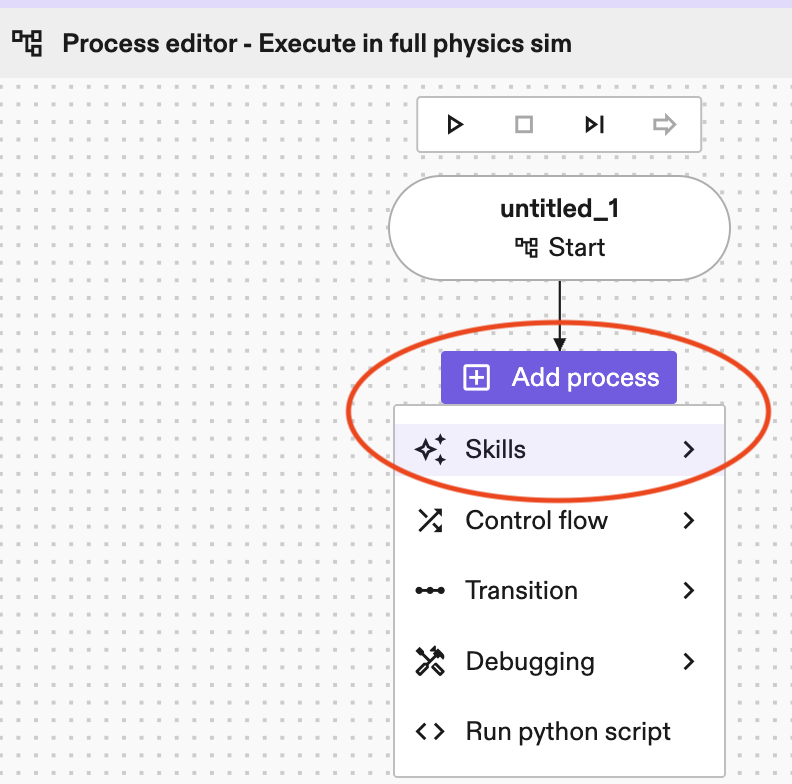
Add a plan_grasp skill
- Add a
plan_graspskill in the Process editor panel by clicking Add process-> skills->plan_grasp.
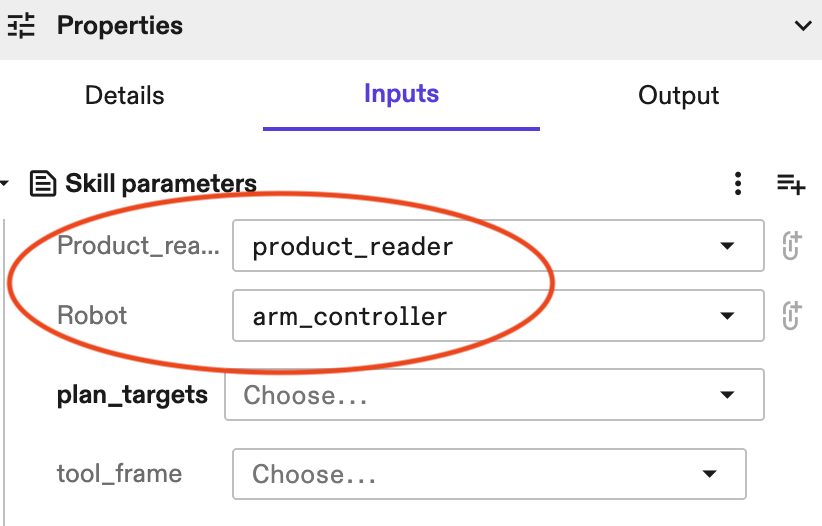
- Under Properties -> Inputs, select corresponding
product_readerandrobotfrom the corresponding drop-down lists.
Get the object poses
There are three ways to configure which object poses are considered for grasping:
-
By providing a list of objects using the
plan_targets.candidate_objectsparameter.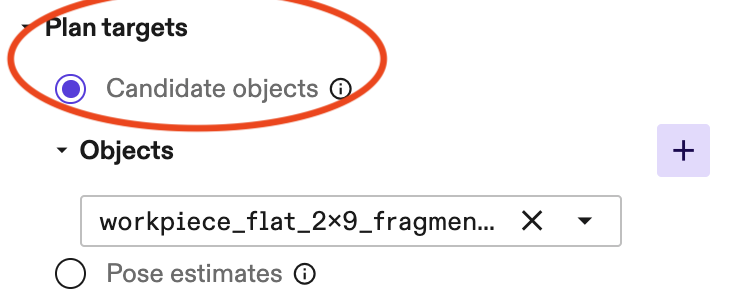
-
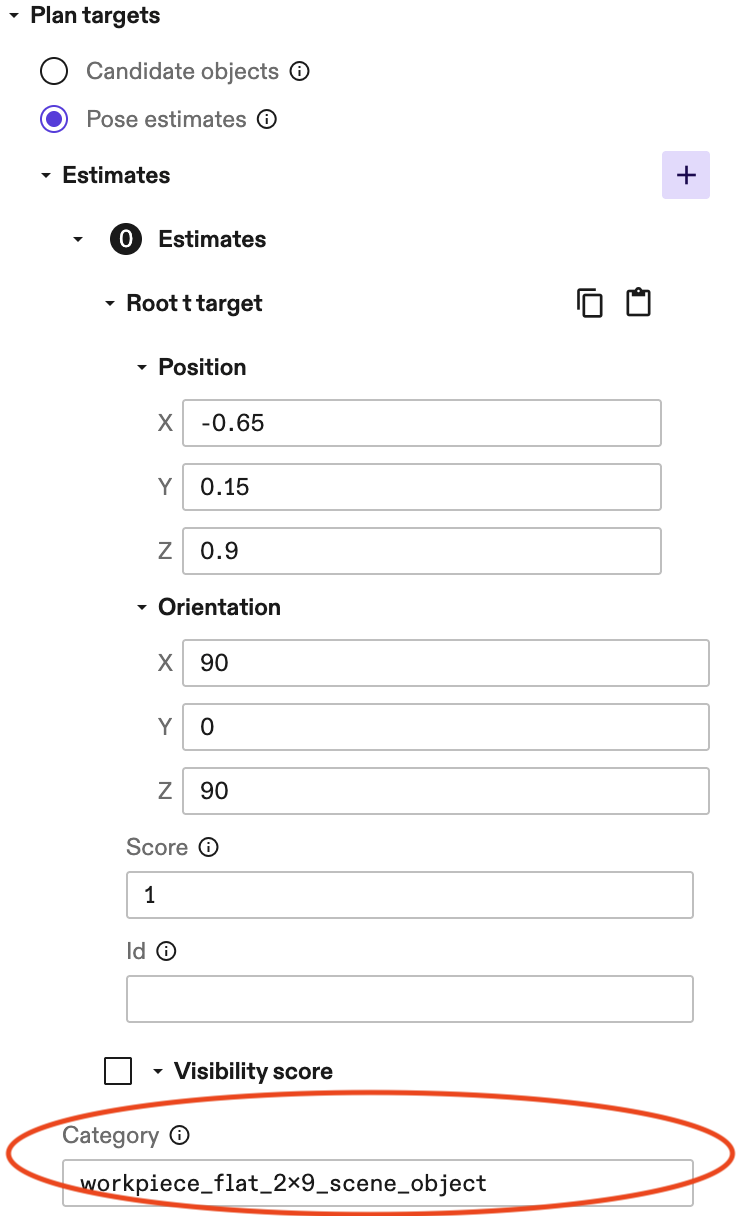
By providing a list of pose estimates using the
plan_targets.pose_estimatesparameter.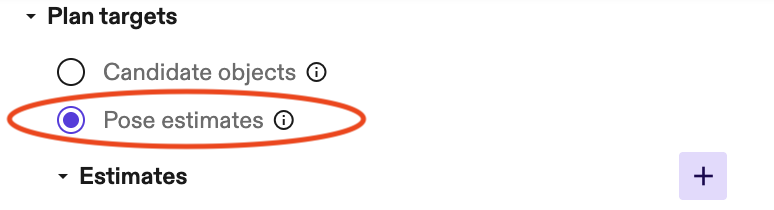
Example of a pose estimate.
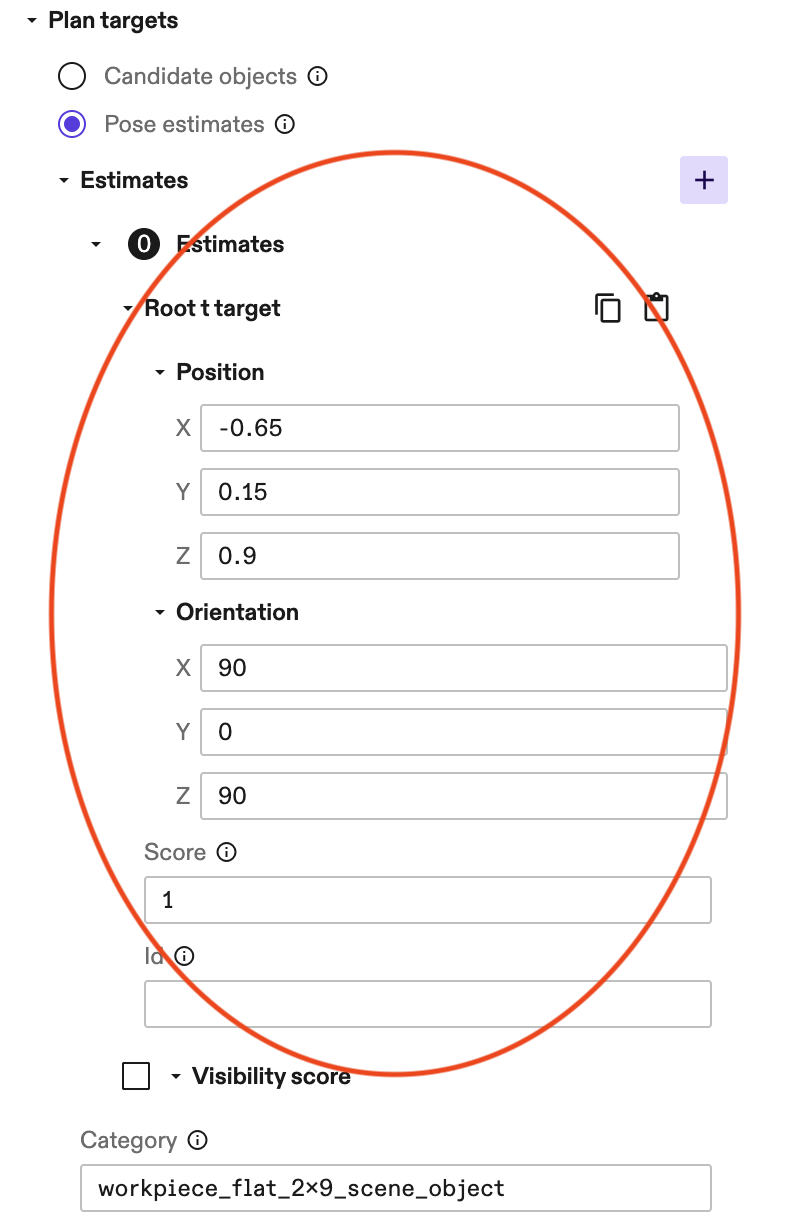
You also need to enter the object category of the pose estimate. See below for an example.
Tip: You can directly link
estimatesto an output of anestimate_poseskill, so you don't need to manually add them. It is a common process to first detect object poses, then use these poses to plan for grasps.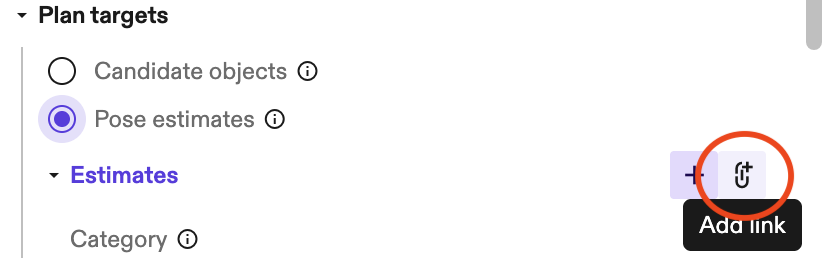
-
By setting the
advanced_params.grasp_bbox_zone. This defines a region in space, and all objects in that region, whose name matches the providedadvanced_params.product_part_nameparameter are considered.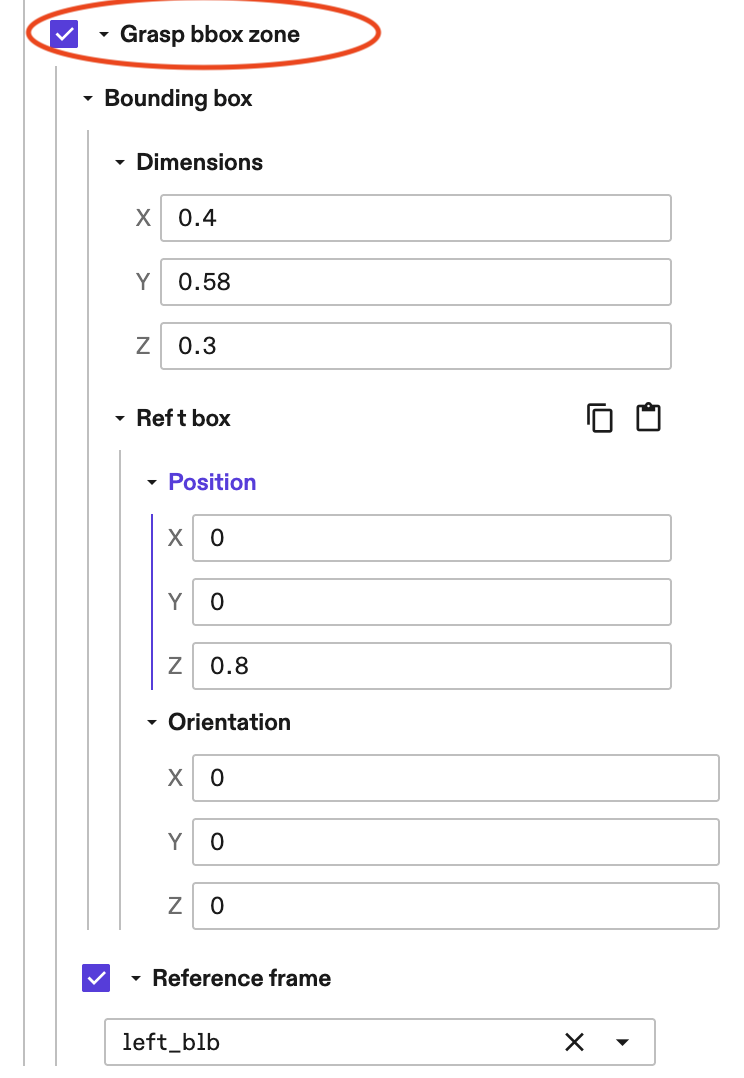
Example parameters of a grasp bounding box zone.
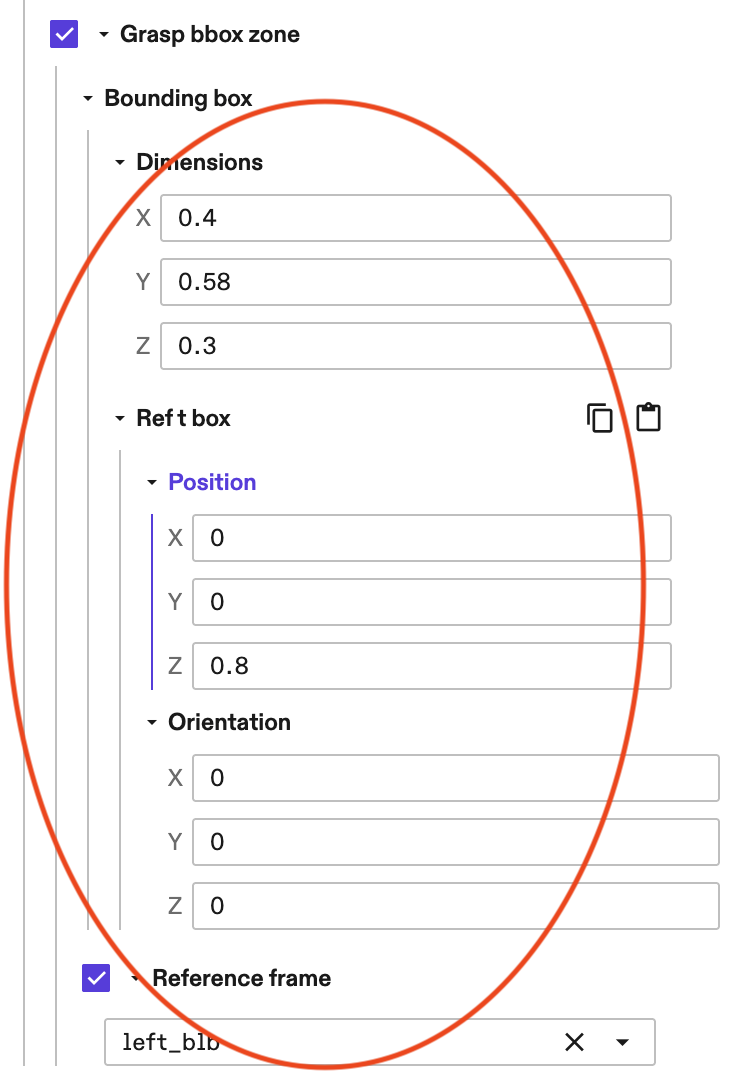
You also need to enter
advanced_params.product_part_name(this assumes the object names use the given product part name as a prefix). See below for an example.
Tip: If you set the optional parameter
debug_modetoTrue, the bounding box zone is visualized by a transparent green box.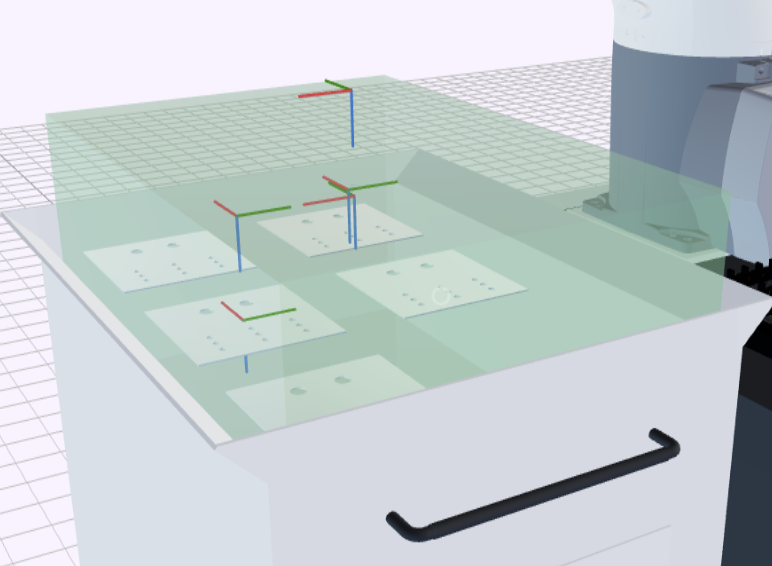
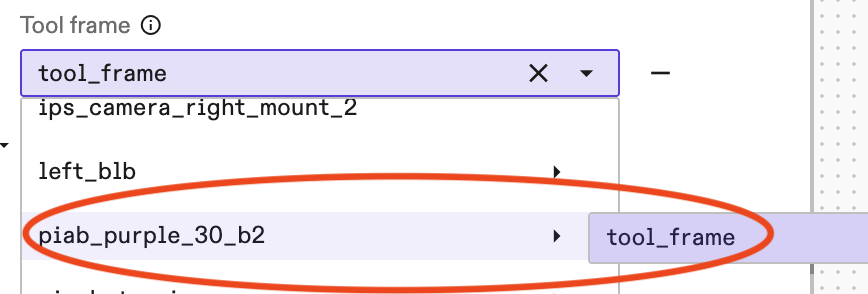
You also need to define the tool_frame, the frame of the tool tip, which executes the grasp. Usually it's gripper -> tool_frame. See below for an example.
Specify how to grasp the object
This can be done in two ways.
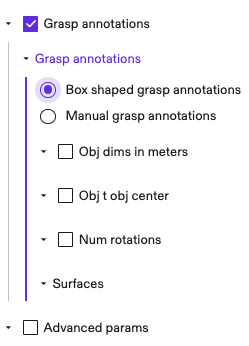
Method 1: Box-shaped grasp annotations
A quick way to annotate a box-shaped object is through grasp_annotations.box_shaped_grasp_annotations. In this case, the skill
computes the center position of each surface and adds grasps on selected
surfaces. The grasp frames have their positive z-axis pointing towards the
target surface, which agrees with the tool frame orientation convention.
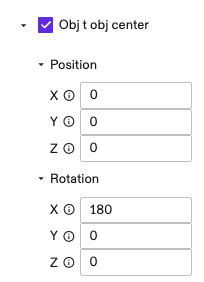
The skill automatically detects the dimensions of the object 3D mesh and the corresponding transform pose from object mesh to object center (i.e., the obj_t_obj_center pose explained below). Skip the steps below if the automatically detected values and default values work for you. Otherwise user specified values override the default ones.
-
(Optional) Specify the dimensions of the object in meters. Note that these are specified in the x, y, z axes of the object frame. Only enter these if the automatically detected dimensions don't work.
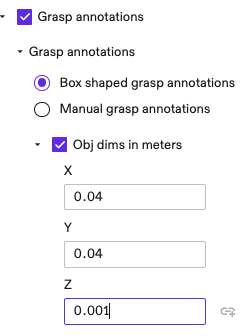
-
(Optional) Enter the pose of object center frame in the mesh frame. You can skip this if the two are the same. Only enter these if the automatically detected pose doesn't work.
-
(Optional) Use
num_rotationsto specify the number of grasps to add on each surface; defaults to 4 when unspecified. These are grasp poses at the center position of a surface, rotated around the z-axis, evenly spread in 360 degrees. For example, ifnum_rotations=4, then the grasps are 90 degree rotations around z-axis.
-
(Optional) Specify the
surfaceson which you would like to add grasps. Defaults to all surfaces if unspecified.0for the surface that intersects the x-axis positive axis;1for the surface that intersects the x-axis negative axis;2for y-axis positive axis;3for y-axis negative axis,4for z-axis positive,5for z-axis negative.
-
(Optional) You can move the grasp frame deeper or shallower with respect to the target surface using
advanced_params.grasp_frame_z_offset_m.
See Step 4 for more tips in adjusting grasp and pregrasp poses.
Note that this parametrization can also apply to objects that aren't box-shaped. For example, you can use it to specify grasps of a cylinder on its top and bottom surfaces.
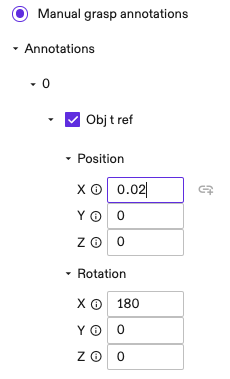
Method 2: Manual grasp annotations
Another method is to specify grasps one by one under grasp_annotations.manual_grasp_annotations. The idea is similar to box-shaped annotations, but instead of adding grasps at surface centers, they are added at user specified poses. This allows specifying grasps for arbitrary shaped objects.
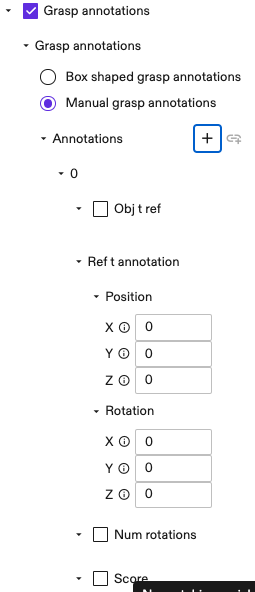
For each new annotation, specify the following parameters:
-
(Optional) Specify the pose from object frame to the reference frame. The reference frame is used in the next step for specifying the grasp pose. This is useful if you would like to specify grasp poses in a different reference frame than the object mesh origin. Defaults to an identity pose if unspecified.
-
Specify the grasp pose in the reference frame using
ref_t_annotation.
-
(Optional) Use
num_rotationsto specify the number of grasps at this position. Similar to the case ofbox_shaped_grasp_annotations, these are rotated around the z-axis ofref_t_annotation, evenly spread in 360 degrees.
-
(Optional) Specify a
scorefor the annotation. This is used in grasp ranking. Use this value to indicate how preferable an annotation is. For example, user may setscore=1for a surface center grasp; andscore=0.5for a less preferable one near edge. All rotated grasps get the same score.
-
(Optional) Similar to the case of box-shaped annotations, user can use
advanced_params.grasp_frame_z_offset_mto adjust the position of grasp and pregrasp frames.
See Step 4 for more tips in adjusting grasp and pregrasp poses.
Propose candidate grasps
For each object pose, the skill then proposes a set of grasps based on annotations defined in the last section.
A returned grasp includes both a grasp pose and a pregrasp pose. The pregrasp pose is obtained by retracting the grasp pose in the negative
z-axis direction of the tool frame by a distance of advanced_params.retract_dist_m.
Adapt candidate grasps
The candidate grasps are adapted using the following set of heuristics, which can be configured using the advanced_params.adapters_params parameter:
- Approaching direction (i.e.,
adapters_params.top_down_adapter_params). In applications like bin-picking, it can be useful to adapt the grasp approaching direction to closer to top-down; this avoids collisions with the bin or nearby items. For example, settingtarget_angle_in_radians=0andmax_tilt_angle_in_radians=np.piwill adapt all grasps to the strictly top-down direction. See each parameter for detailed usages.
Rank candidate grasps
The candidate grasps are scored/filtered using the following set of heuristics, which can be configured using the advanced_params.rankers_params parameter:
- Existence of an IK solution for the pregrasp and grasp poses, and a straight line path between them, that are collision-free in the belief world
- Height (z-coordinate in root frame)
- Visibility (assumes the vision algorithm included a visibility score with each detection)
- Approach direction (grasps are scored higher the closer they are to a vertical approach)
Add placement constraints
Optionally, you can define constraints to check reachability and pose validity at the placement site, ensuring the planned grasp supports a successful hand-off.
To enable this feature, specify the placement constraint checker at advanced_params.rankers_params.placement_constraint_checker_params:
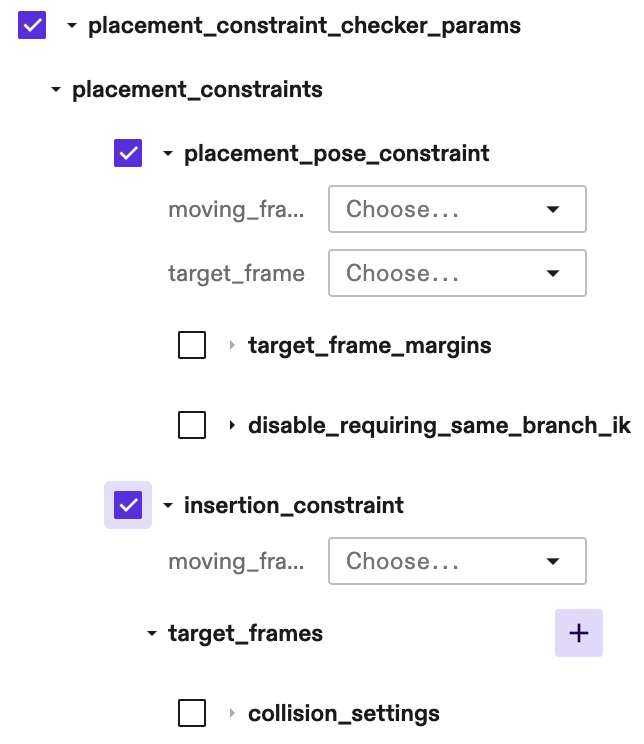
Currently two types of placement constraints are supported:
-
Exact placement pose constraint
Configure
placement_pose_constraintto verify if the desired final placement pose is reachable. This is critical for tight insertion or placing parts into fixtures (like a CNC vise).moving_frame: The frame on the object that should align with the target.
target_frame: The final, desired placement pose in the world.
target_frame_margins (Optional): If specified, the system will search for a feasible IK solution within a margin around the target_frame. Currently only supports margin in one of the [X, Y, Z] directions. Only specify this when specifying just the exact target frame does not fulfill your purpose, as it increases planning time. The found solution will be populated in the skill return value.
-
Insertion constraint
Configure
insertion_constraintto verify the reachability of a set of representative waypoints that can define the "boundary" of the insertion motion(s).If insertion is a linear motion, the start and end frames can be used.
If insertion consists of one or more force skills like MoveToContact or ApplyForceActions:
-
For moving to contact, use the start and end frames;
-
For pattern search insertion kind of force skills, include representative boundary points of the pattern and optionally the start point, e.g. some of the A, B, C, D, E, F, G and H as illustrated below on the boundary of the following pattern bounding box.
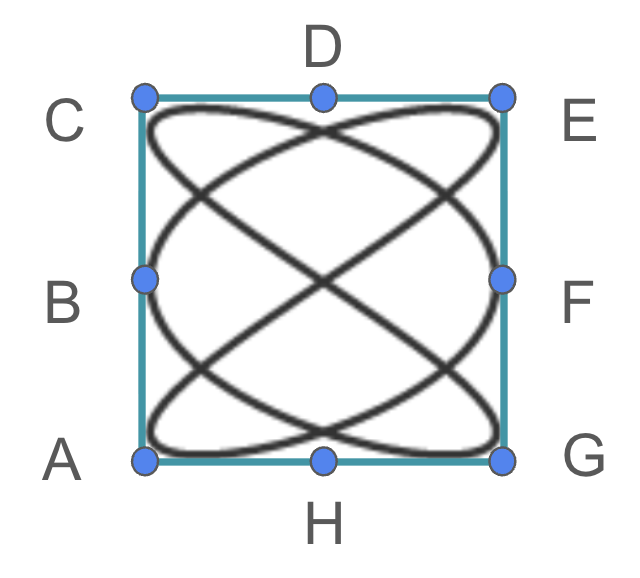
Optionally, specify other representative points within the motion range, but keep in mind that any new point will consume additional planning time.
moving_frame: Moving frame that will be aligned with the target frame(s). This can be a tool or tip frame, or a frame on the object.
target_frames: A list of representative poses that define the boundary or path of the insertion motions. For example, if the insertion is a linear motion, the two waypoints before and after the motion can be checked here; or if it's one or more force skills, some representative waypoints (e.g., the center and edge points of the pattern search insertion) can be checked here.
-
This feature works by filtering out unqualified grasps. You can set max_num_grasps to a higher number than 1 (which is the default) to get multiple valid grasps.
Return (and use) the results
Having selected the best grasps, the skill returns them as part of its output as well as writing them into the world. Recall that each grasp includes poses for the grasp itself as well as a pregrasp position. Two ways to actually execute a returned grasp are:
-
Use the
move_robotskill to move to the pregrasp pose, then to the grasp pose. Use the gripper skills to close/engage the gripper (e.g.,control_suction_gripper,control_pinch_gripper), and then retract back to the pregrasp pose using anothermove_robotinvocation. -
Alternatively, you could use the
grasp_objectskill to both plan and execute grasps, which means you no longer need to callplan_grasp.
Run an example via tutorial
Pick-and-place module 2 lesson 4 goes through plan grasp.
Tips
- Set
debug_modetoTrue, in order to visualize planned grasps (shown as frames in the world for 1 second, then disappear) and thegrasp_bbox_zone(a transparent green box). Note this slows down planning for at least 1 second.
- Reduce
advanced_params.grasp_frame_z_offset(e.g., from 0 to -0.02 meter) to move the grasps further from the object. This usually helps debug collisions. - Set
advanced_params.rankers_params.ik_collision_checker_params.require_same_branch_ikto False, can help finding feasible IK solutions.