Grasp an object
The grasp_object skill plans and executes grasps using a suction gripper or
a pinch gripper (either a non-adaptive pinch gripper, e.g., a pneumatic pinch gripper; or an adaptive one that allows user to set finger positions). It
can grasp an object from a singulated, stacked, or cluttered scene.
This document explains how to use it step-by-step. There are a few different
workflows, and this document is specifically describing the workflow where the
objects are present in the belief world when the skill starts.
How to use the skill
Instructions for using the grasp_object skill.
Step 1: Create a grasp planner service and product reader service
You can skip this step if your application already contains both a grasp planner service and a product reader service. A grasp planner service can speed things up using asynchronous grasp planning when certain parameters are set (steps not covered in this tutorial). A product reader allows creating product objects in the belief world.
-
In the frontend, click
+button and selectAdd to scene.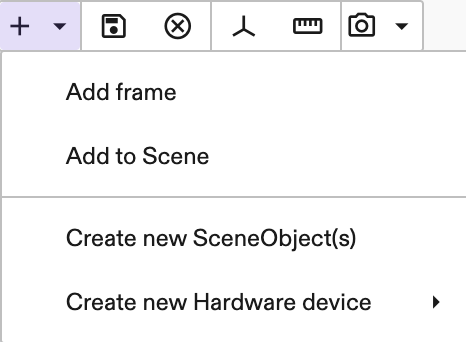
-
In the
Add to Scenewindow, selectGraspPlannerService, and then give it an instance name, for example,grasp_planner_service. This will add a new grasp planner service into your application.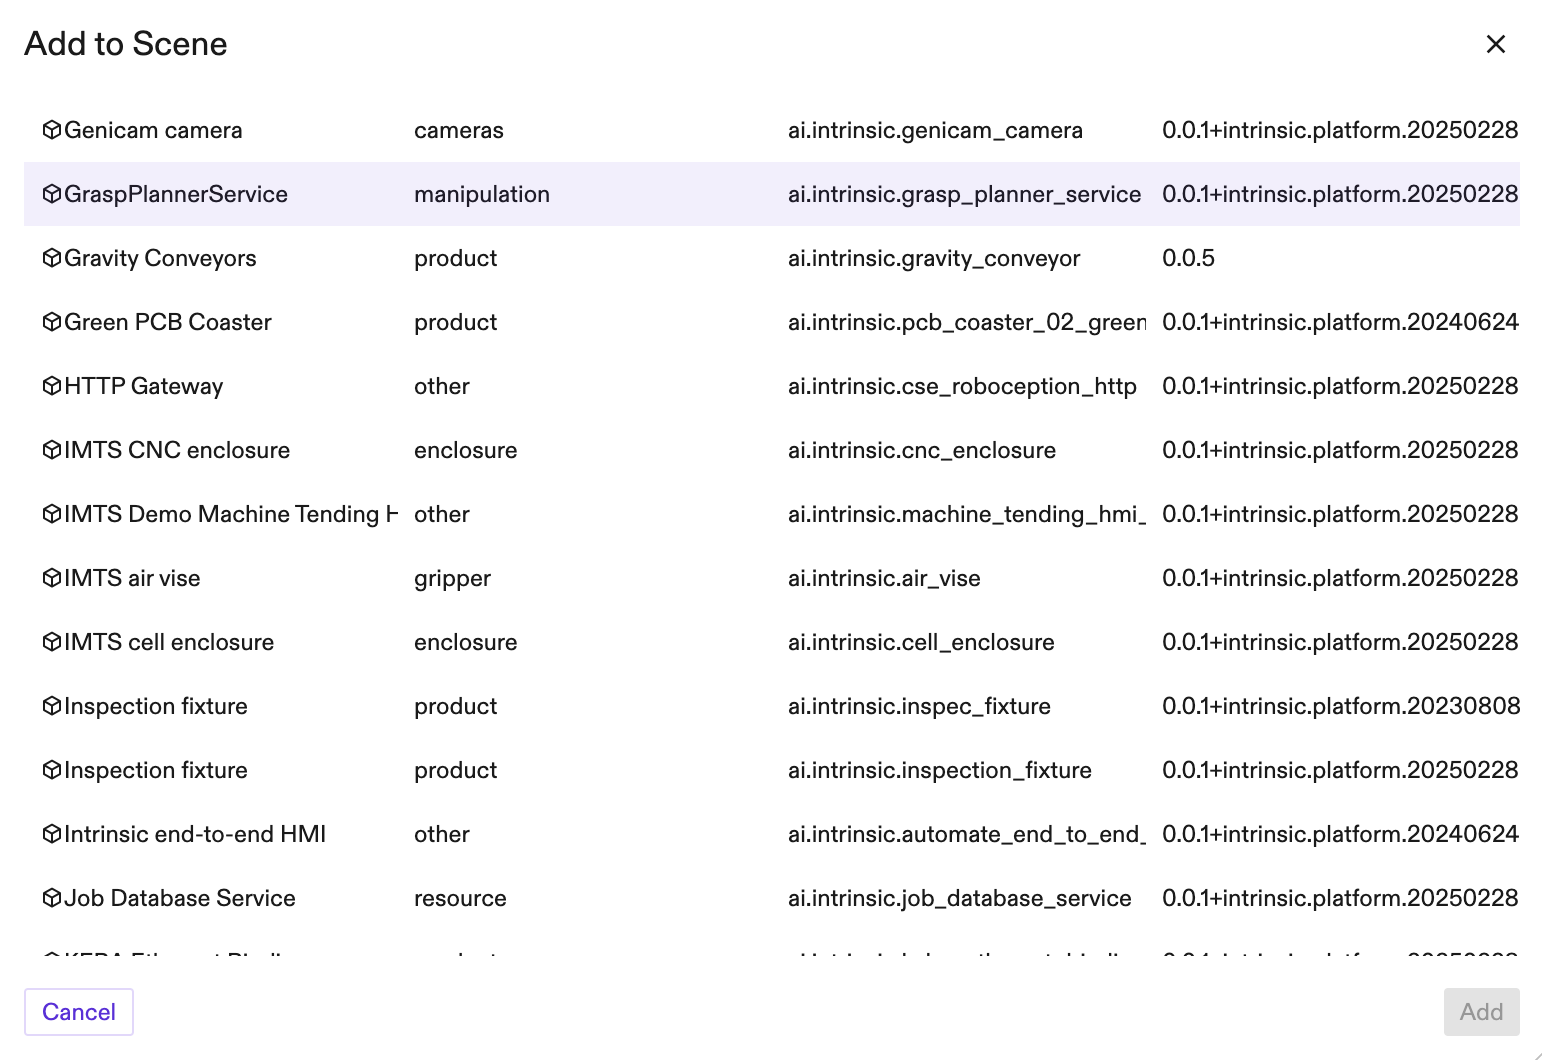
-
When this step completes, you will see
grasp_planner_servicelisted under theServicespanel on the right hand side.
-
Repeat 2 for the
Product Readerservice. The product reader service allows getting the product data necessary to create a WorldObject in a skill. Refer to https://flowstate.intrinsic.ai/docs/catalog/services/product_reader for more information on the product reader service.
For a more detailed guide on adding service, follow the Create a new service guide to find and add the Product Reader service from the catalog.
Step 2: Add a grasp_object skill
-
In the
Process editorpanel, add a newgrasp_objectskill.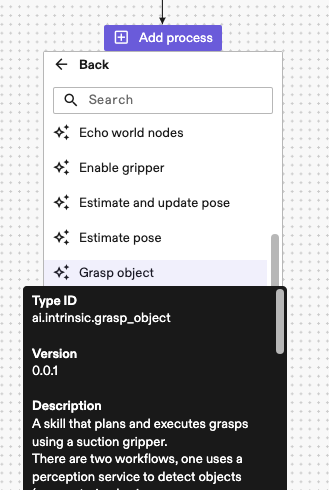
-
Select the newly added
grasp_objectskill. Under itsProperty->Inputspanel on the left, you can see its parameters.
-
Select
grasp_planner_service,gripper,product_readerandrobotfrom the corresponding drop-down lists.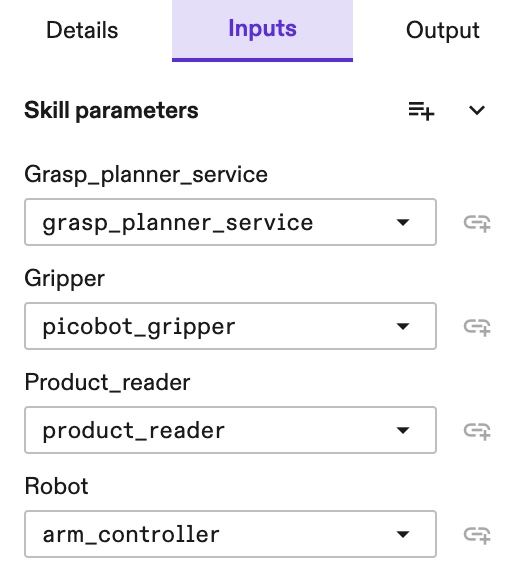
-
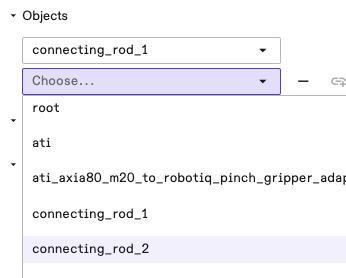
Add the object to be grasped under parameter
Objects. For example, in the next figure "connecting_rod_1" is added.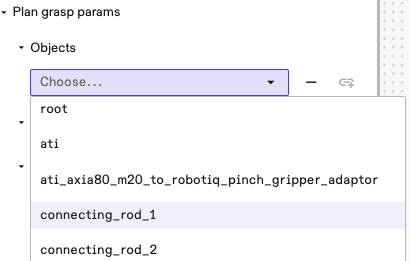
-
Optionally, you can add more candidate objects. When multiple objects are added, the skill selects a target based on a predefined set of heuristics (e.g., whether an object is reachable; prefers grasps at higher positions; prefers grasping directions closer to the top-down direction).
Note that all candidate objects have to be the same object model. The skill doesn't support multiple object types.
-
Enter the corresponding
product_part_name. If objects have been specified in step 4, then this is optional and you can enter any name you like (e.g.,my_part). -
Select
tool_frame. For example, this can begripper->tool_frame. This frame is used as the moving frame in motion planning to align with the target grasp and pregrasp poses.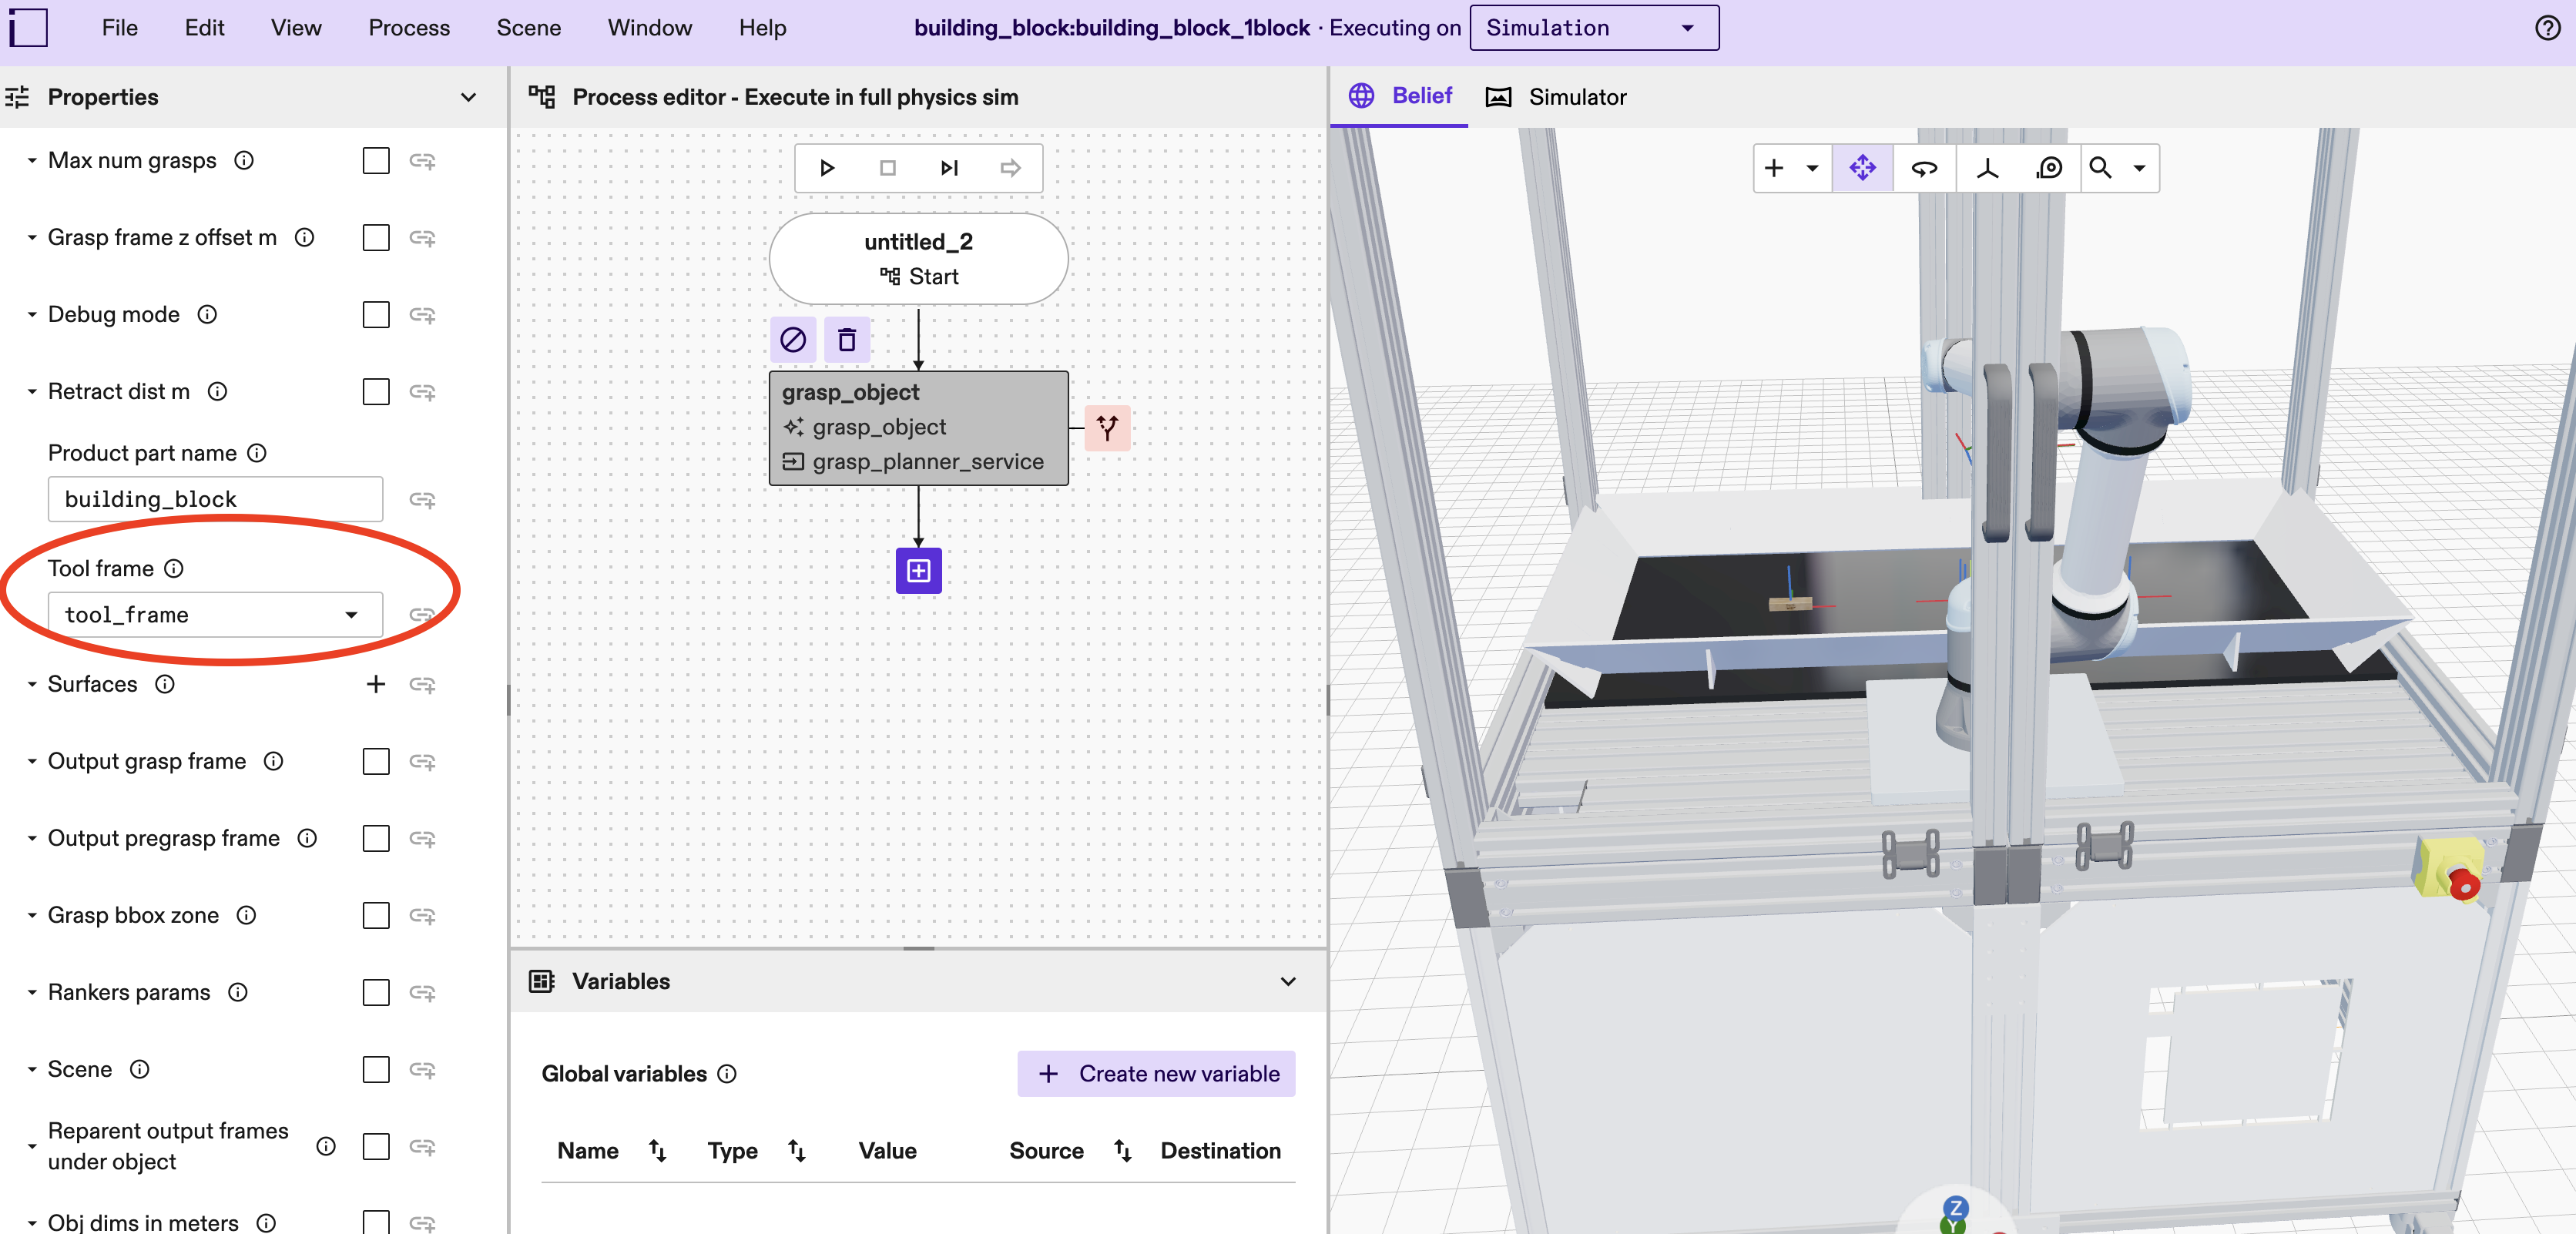
-
Select
gripper_type. The skill only supportsSUCTIONgripper and non-adaptivePINCHgripper (e.g., a pneumatic pinch gripper).
-
(Optional) Enable
debug_mode. This visualizes filtered grasp frames in the scene for 1 second, and thegrasp_bbox_zoneas a transparent green box when specified.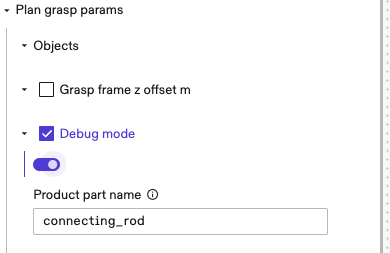
-
(Optional) You can use
grasp_frame_z_offset_mto adjust how deep the grasp goes into the object surface. This is in positive-z axis of the tool frame. For example, to move the grasp point 1 centimeter deeper towards the object than the default position, set this to0.01as shown in the next image. This can compensate for small inaccuracies in the pose (assuming a compliant suction cup). Defaults to 0 when unspecified.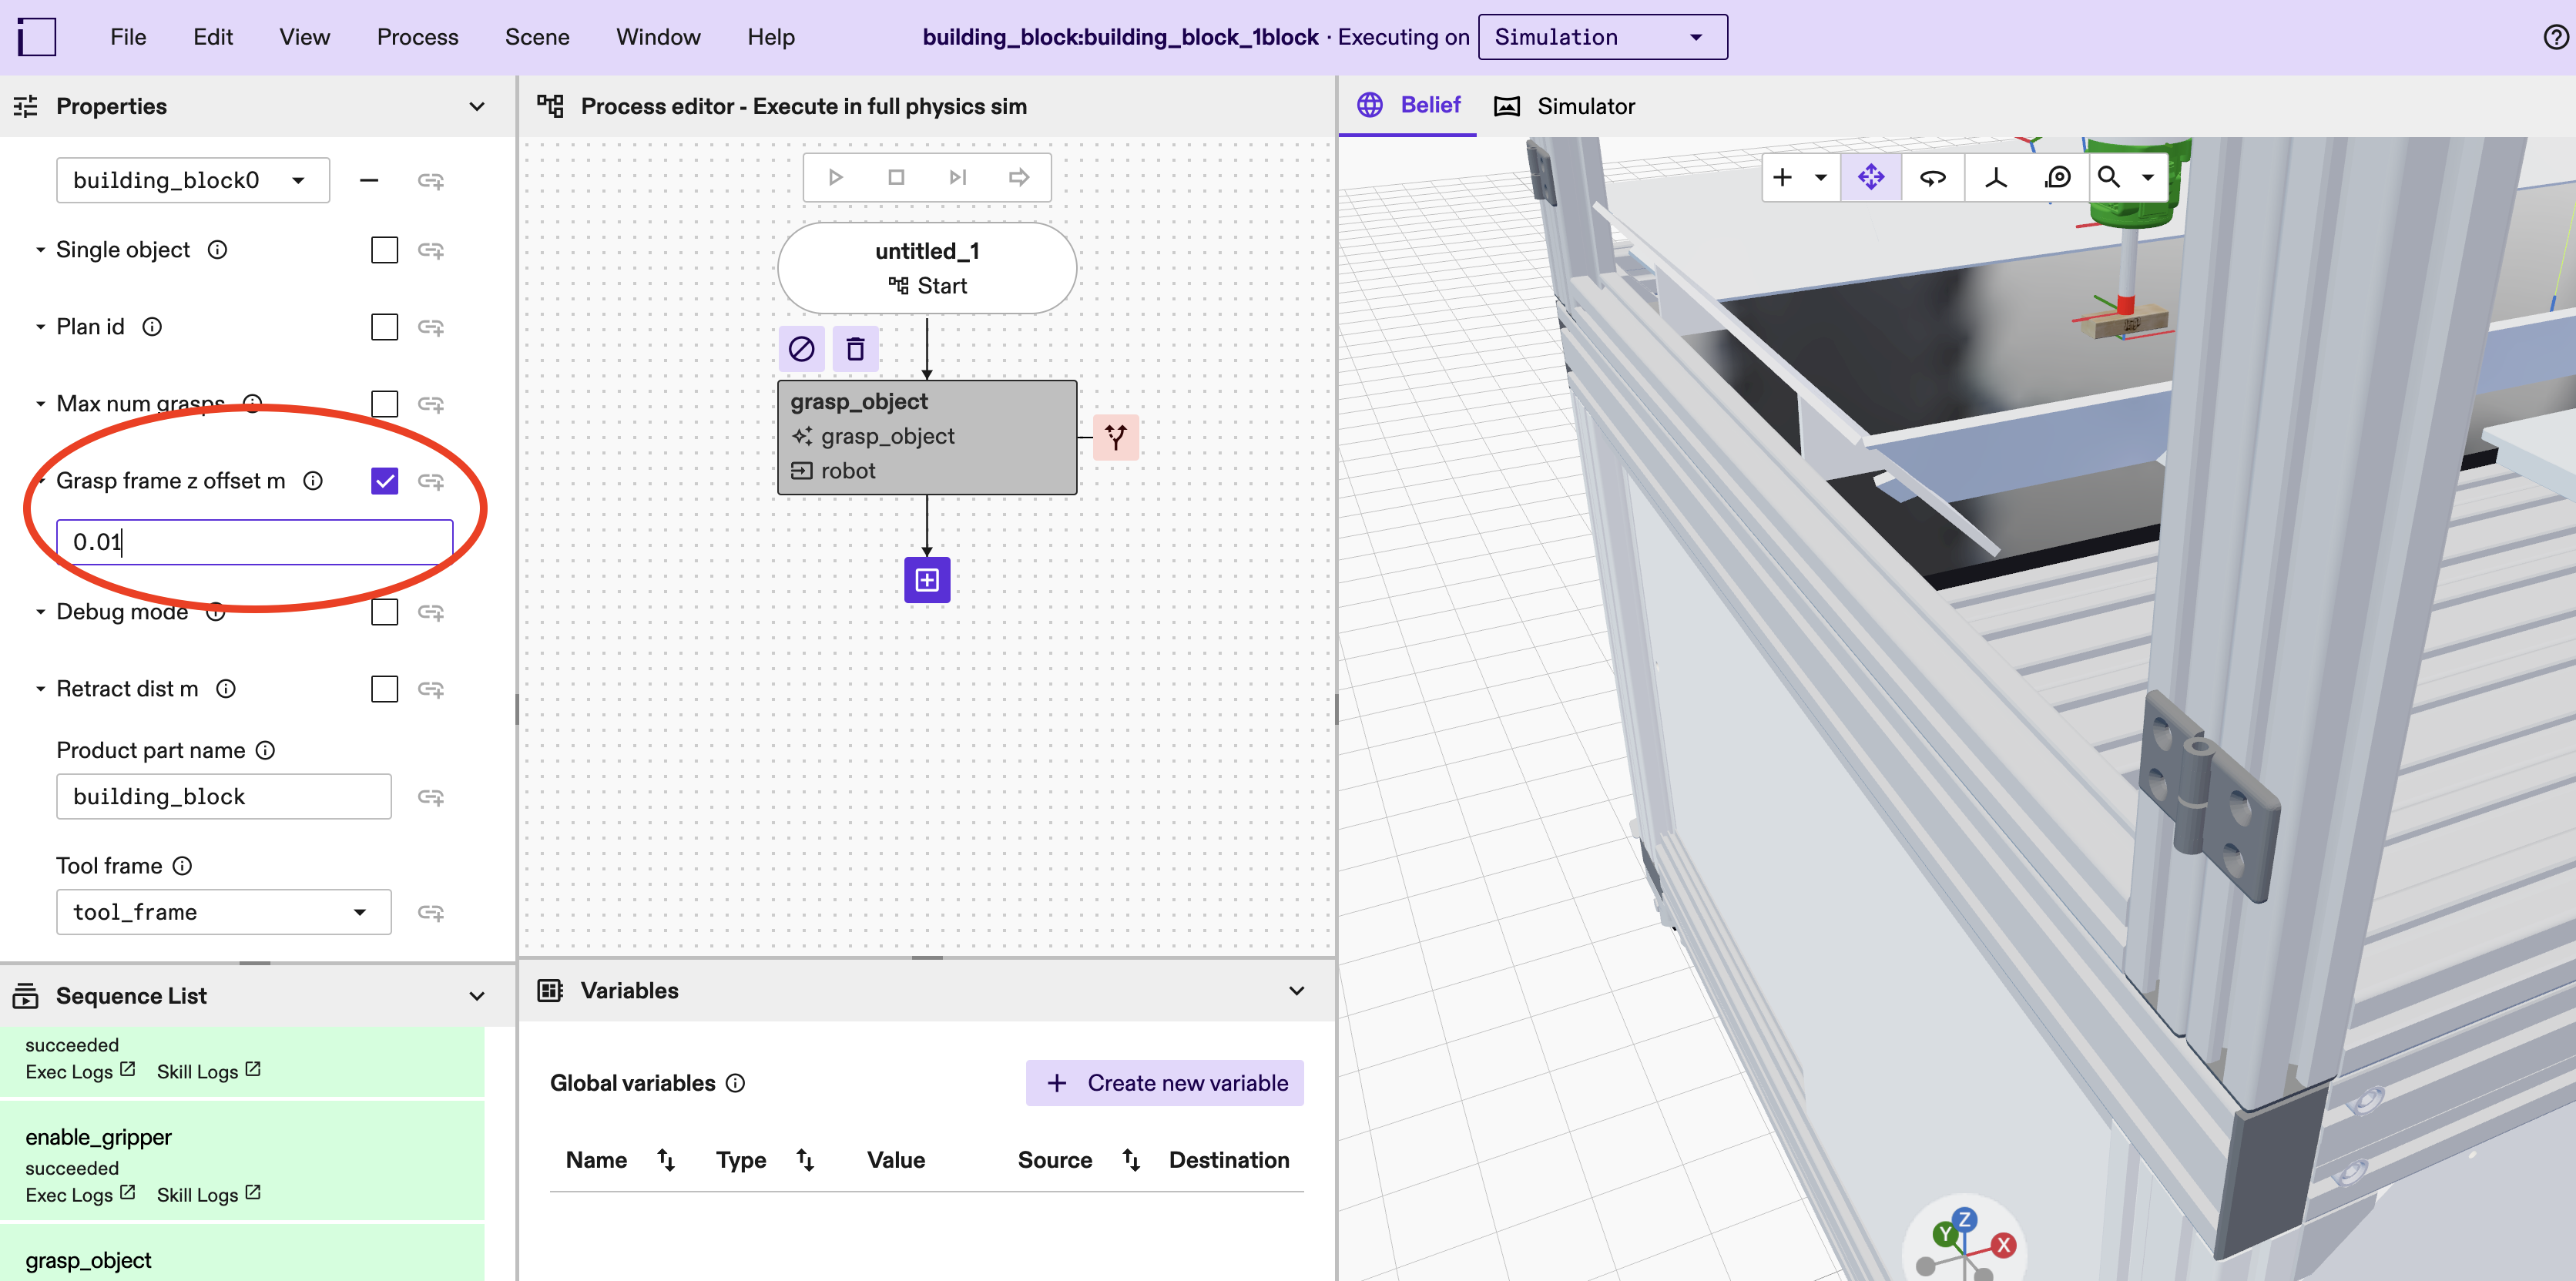
-
(Optional) Set advanced parameters as needed. See Step 4 for more details.
Step 3: Specify how you want to grasp the object
This can be done in two ways.
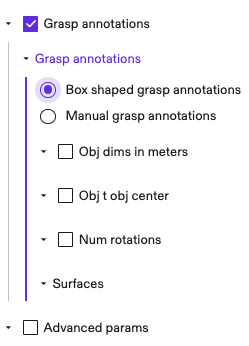
Method 1: Box-shaped grasp annotations
A quick way to annotate a box-shaped object is through plan_grasp_params.grasp_annotations.box_shaped_grasp_annotations. In this case, the skill
computes the center position of each surface and adds grasps on selected
surfaces. The grasp frames have their positive z-axis pointing towards the
target surface, which agrees with the tool frame orientation convention.
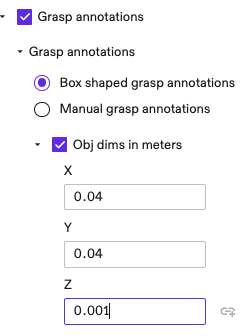
-
Specify the dimensions of the object in meters. Note that these are specified in the x, y, z axes of the object frame.
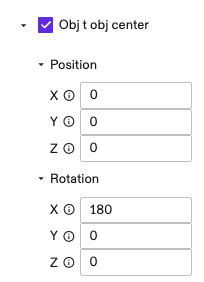
-
(Optional) Enter the pose of object center frame in the mesh frame. You can skip this if the two are the same.
-
(Optional) Use
num_rotationsto specify the number of grasps to add on each surface; defaults to 4 when unspecified. These are grasp poses at the center position of a surface, rotated around the z-axis, evenly spread in 360 degrees. For example, ifnum_rotations=4, then the grasps are 90 degree rotations around z-axis.
-
(Optional) Specify the
surfaceson which you would like to add grasps. Defaults to all surfaces if unspecified.0for the surface that intersects the x-axis positive axis;1for the surface that intersects the x-axis negative axis;2for y-axis positive axis;3for y-axis negative axis,4for z-axis positive,5for z-axis negative.
-
(Optional) You can move the grasp frame deeper or shallower with respect to the target surface using
plan_grasp_params.grasp_frame_z_offset_mas mentioned in Step 2.10.
See Step 4 for more tips in adjusting grasp and pregrasp poses.
Note that this parametrization can also apply to objects that aren't box-shaped. For example, you can use it to specify grasps of a cylinder on its top and bottom surfaces.
Method 2: Manual grasp annotations
Another method is to specify grasps one by one under grasp_annotations.manual_grasp_annotations. The idea is similar to box-shaped annotations, but instead of adding grasps at surface centers, they are added at user specified poses. This allows specifying grasps for arbitrary shaped objects.
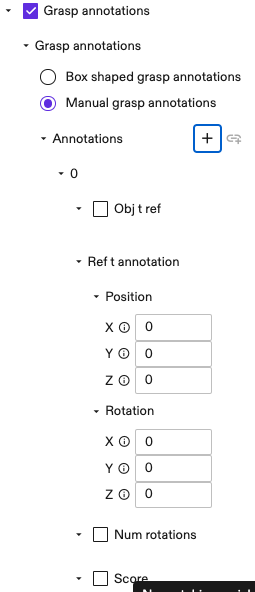
For each new annotation, specify the following parameters:
-
(Optional) Specify the pose from object frame to the reference frame. The reference frame is used in the next step for specifying the grasp pose. This is useful if you would like to specify grasp poses in a different reference frame than the object mesh origin. Defaults to an identity pose if unspecified.
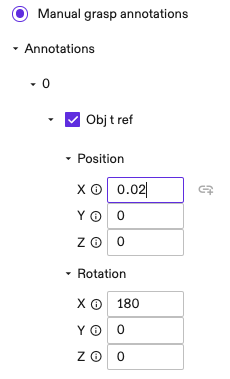
-
Specify the grasp pose in the reference frame using
ref_t_annotation.
-
(Optional) Use
num_rotationsto specify the number of grasps at this position. Similar to the case ofbox_shaped_grasp_annotation, these are rotated around the z-axis ofref_t_annotation, evenly spread in 360 degrees.
-
(Optional) Specify a
scorefor the annotation. This is used in grasp ranking. Use this value to indicate how preferable an annotation is. For example, user may setscore=1for a surface center grasp; andscore=0.5for a less preferable one near edge. All rotated grasps get the same score.
-
(Optional) Similar to the case of box-shaped annotations, user can use
grasp_frame_z_offset_mto adjust the position of grasp and pregrasp frames.
See Step 4 for more tips in adjusting grasp and pregrasp poses.
Step 4: Advanced Parameters
This section explains some useful parameters under
plan_grasp_params.advanced_params.
-
(Optional) You can move the pregrasp frame further or closer to the grasp frame using
advanced_params.retract_dist_m. For example, set this to0.05means pregrasp frame is 5 cm above the grasp frame along its negative-z axis. Defaults to 0.1 when unspecified.
-
(Optional) If you want to enable collision checks at grasp poses ( this is disabled by default to allow contact between gripper and the target object), then set
check_collision_at_grasp_poseunderadvanced_params.rankers_params.ik_collision_checker_paramstoTrueas shown in the next image.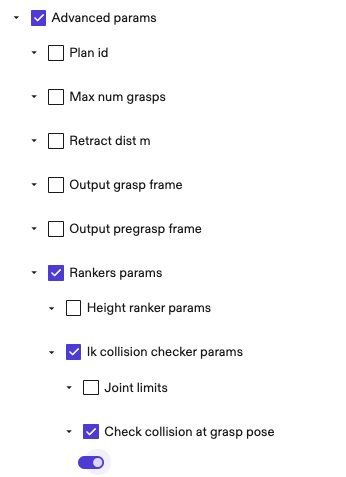
If you want to enable collision checks at grasp poses except
between gripper and the target object; then besides
check_collision_at_grasp_pose=True,
also specify advanced_params.gripper_object. This disables collision
checks between the gripper object (and its children objects) and the
target object. gripper_object has no effect when
check_collision_at_grasp_pose=False.
Preconditions and Postconditions
Preconditions and postconditions of this skill for this particular case where target objects exist in the scene.
Preconditions
-
The target gripper does not hold any object, and the arm is in a collision-free position.
-
Target objects already exists in the belief world.
Postconditions
Success postconditions:
-
In all successes: the target gripper holds a selected object;
-
Multiple grasps may have been executed even in the happy path (if initial grasps failed, and a subsequent grasp succeeded).
Failure postconditions:
-
In all failures: the gripper does not hold any object, and the arm is in a collision-free pose;
-
if the skill failed during planning stage to find valid grasps, then the arm doesn't move at all;
-
if planning succeeded and grasps were executed, but all of them failed, then the arm moves.
Skill Logic
The skill includes the following logic:
-
Grasp planning
- Based on the object poses (extracted from passed in object references), proposes grasp and pregrasp poses. See plan grasp for more details.
- (Optionally) adapts grasps to increase their chance of success.
- Ranks grasps based on heuristics such as inverse kinematics feasibility, collision freeness, grasp approaching direction.
- Selects the best grasp candidates.
-
Grasp executions
- Plans and executes grasp motions. (The motion may be preplanned by the grasp planner service.)
- Opens and closes the gripper.
- Attaches the grasped object to the gripper in the belief world.
- Checks if an object is successfully picked up using the gripper's gripping indicated signal (sometimes called the part present signal).
- Repeats steps 3.a~3.d for each proposed grasp until one succeeds.