Configure a camera
During camera configuration, certain physical properties of the camera, such as focus, as well as software settings, like exposure time and gain, are initialized. The camera should be configured in a way that provides the best results for the final pose estimation task.
The required kind of adjustment settings vary based on the camera type. A camera with an adjustable lens, for example, requires different setup steps than a camera with a fixed lens, or an RGB camera requires setting different parameters than a depth camera.
Prerequisites
Before proceeding, ensure you have the following:
- An application running on the physical workcell.
- The expected amount of pose variations of the object of interest.
- Cycle time requirements.
- Whether it is necessary to estimate the pose of moving parts, such as a conveyor belt.
Open the camera configuration panel
-
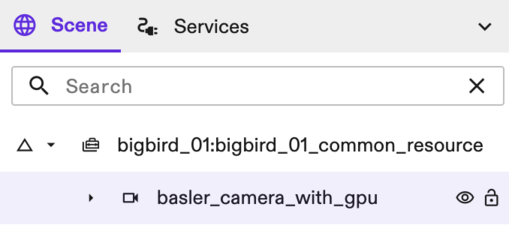
With your application open in Flowstate, go to the Scene on the right side.
-
Select your camera in the Scene tree.
- In the Properties panel on the left side of the screen, under Settings, select the Camera settings option.
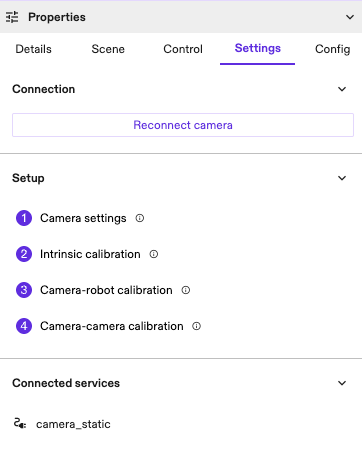
A live camera view is then shown.
Adjust focus
Note: This step is only required if your camera has an adjustable lens; a lens where the focus can be set manually to adjust the sharpness in the image.
For a highly accurate pose estimate, ensure that the object and the entire working volume (all possible positions of the object) are in focus. For example:
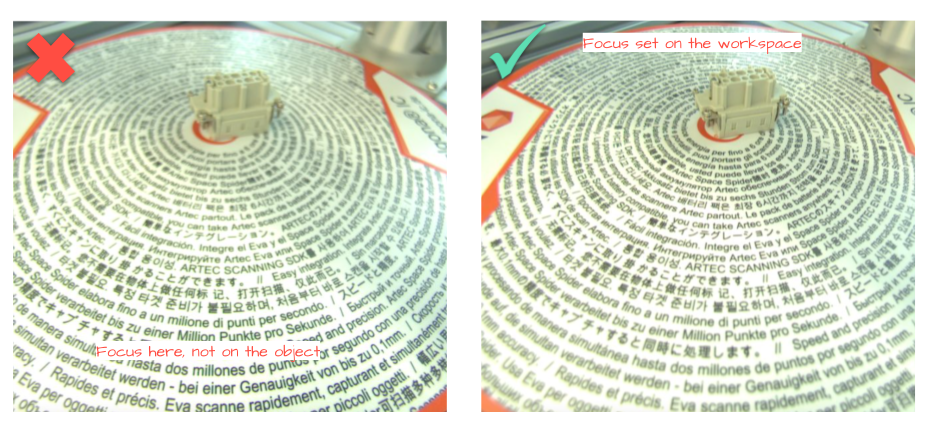
Focus is adjusted physically on the lens.
Tips:
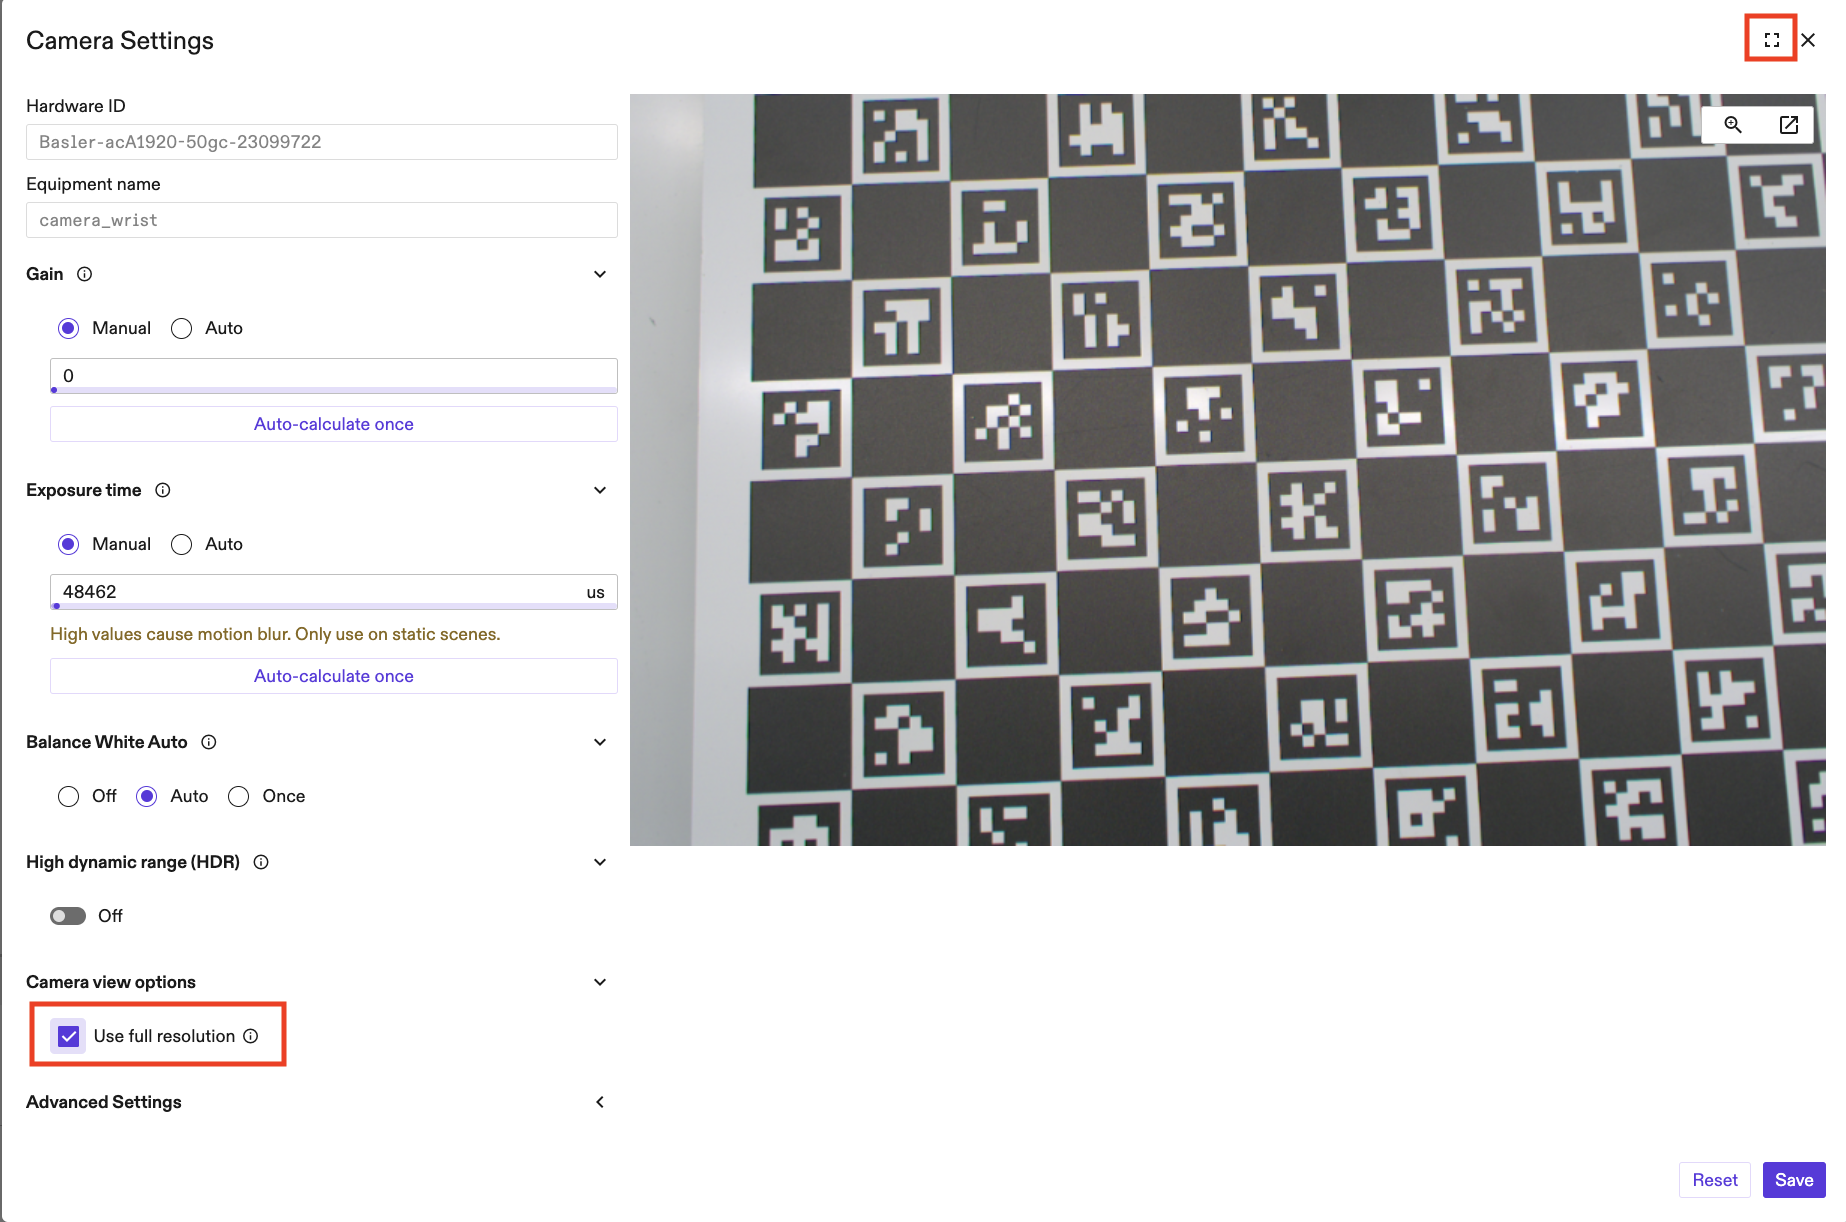
- Switch to full screen & full resolution mode (see image) in the UI to see the image in higher resolution.
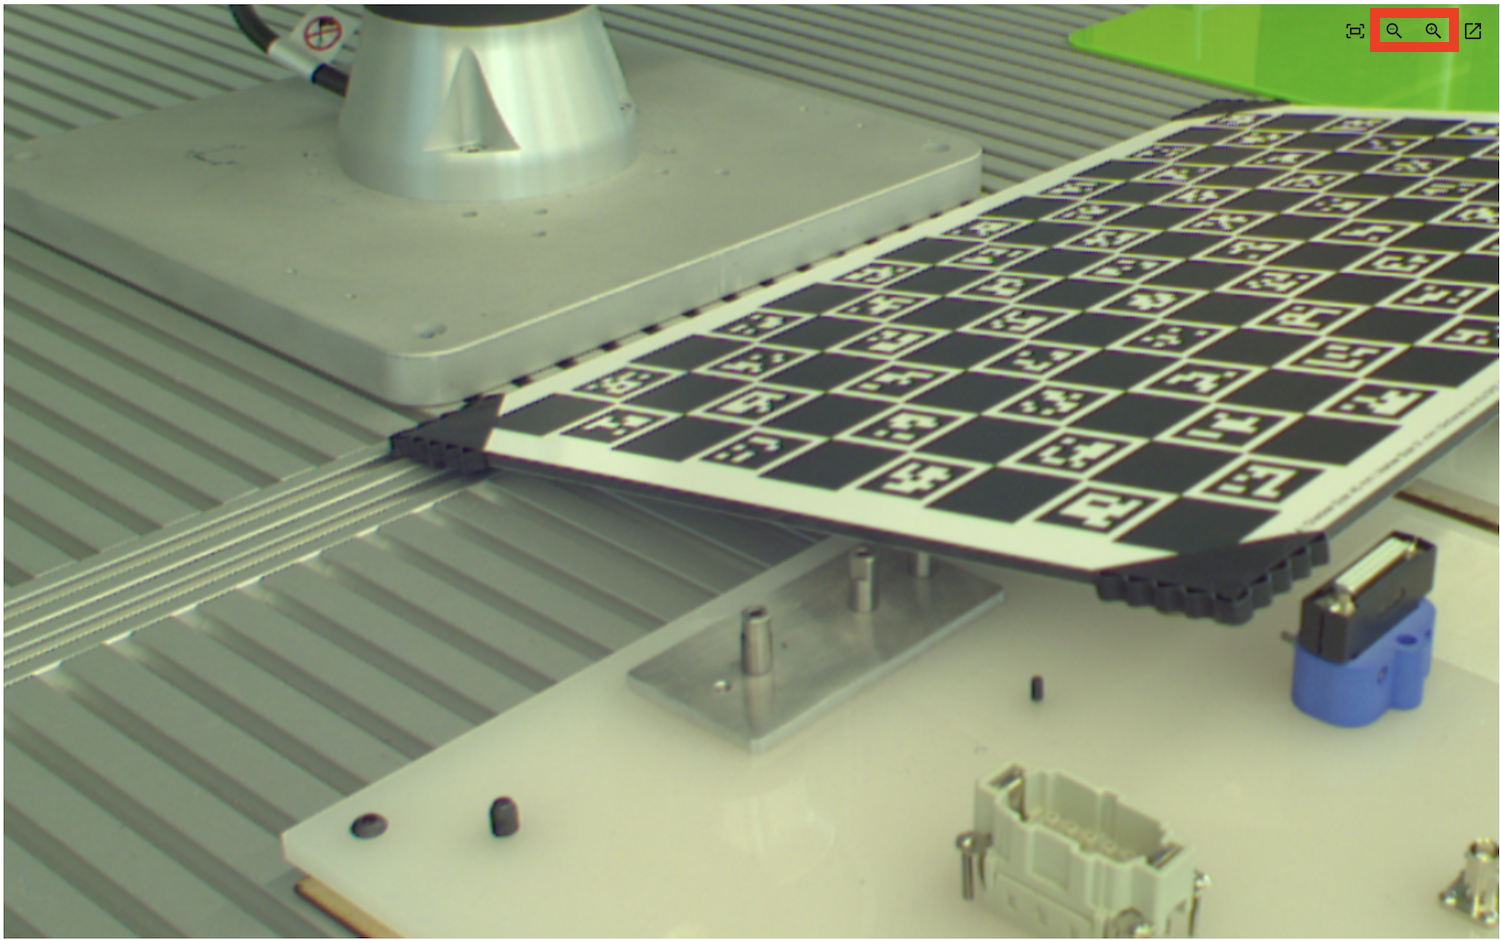
- You can also use the zoom-in feature to view an important part of the image.
- Place a calibration board or newspaper in the middle of your working volume. Sharpness can be seen better when the contrast is high.
- Adjust the aperture ring to the lowest possible value (letting most light in). This should decrease your depth of field (meaning less of your working volume is sharp), but should help you view which areas of the image are in focus. After fixing the focus ring, you can then set the aperture to a higher value again.
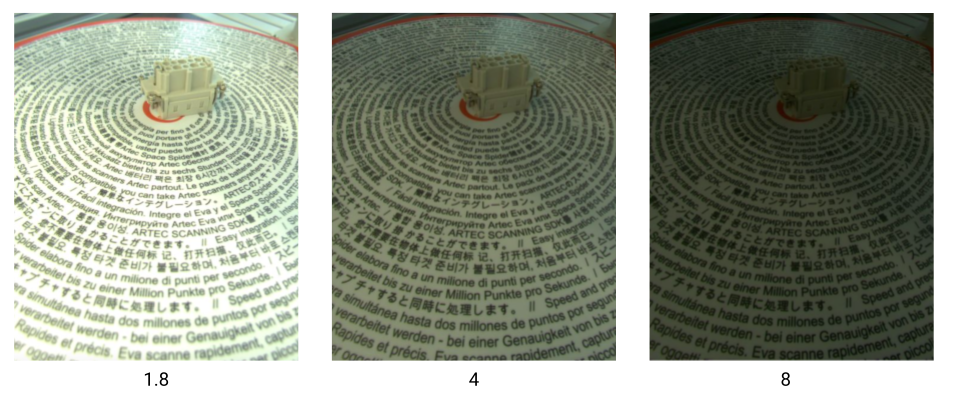
Adjust aperture
Note: This is only required if your camera has a lens with an adjustable aperture setting.
Aperture specifies the opening of the lens and is also adjusted physically on the lens. When it is more open (counterintuitively, this corresponds to a lower f-number), more light is let in and the image should be brighter, but your depth of field decreases.
Ensure that the aperture is high enough to keep your working volume in focus while allowing for enough light. A mid-value, usually around 4, works well for most.
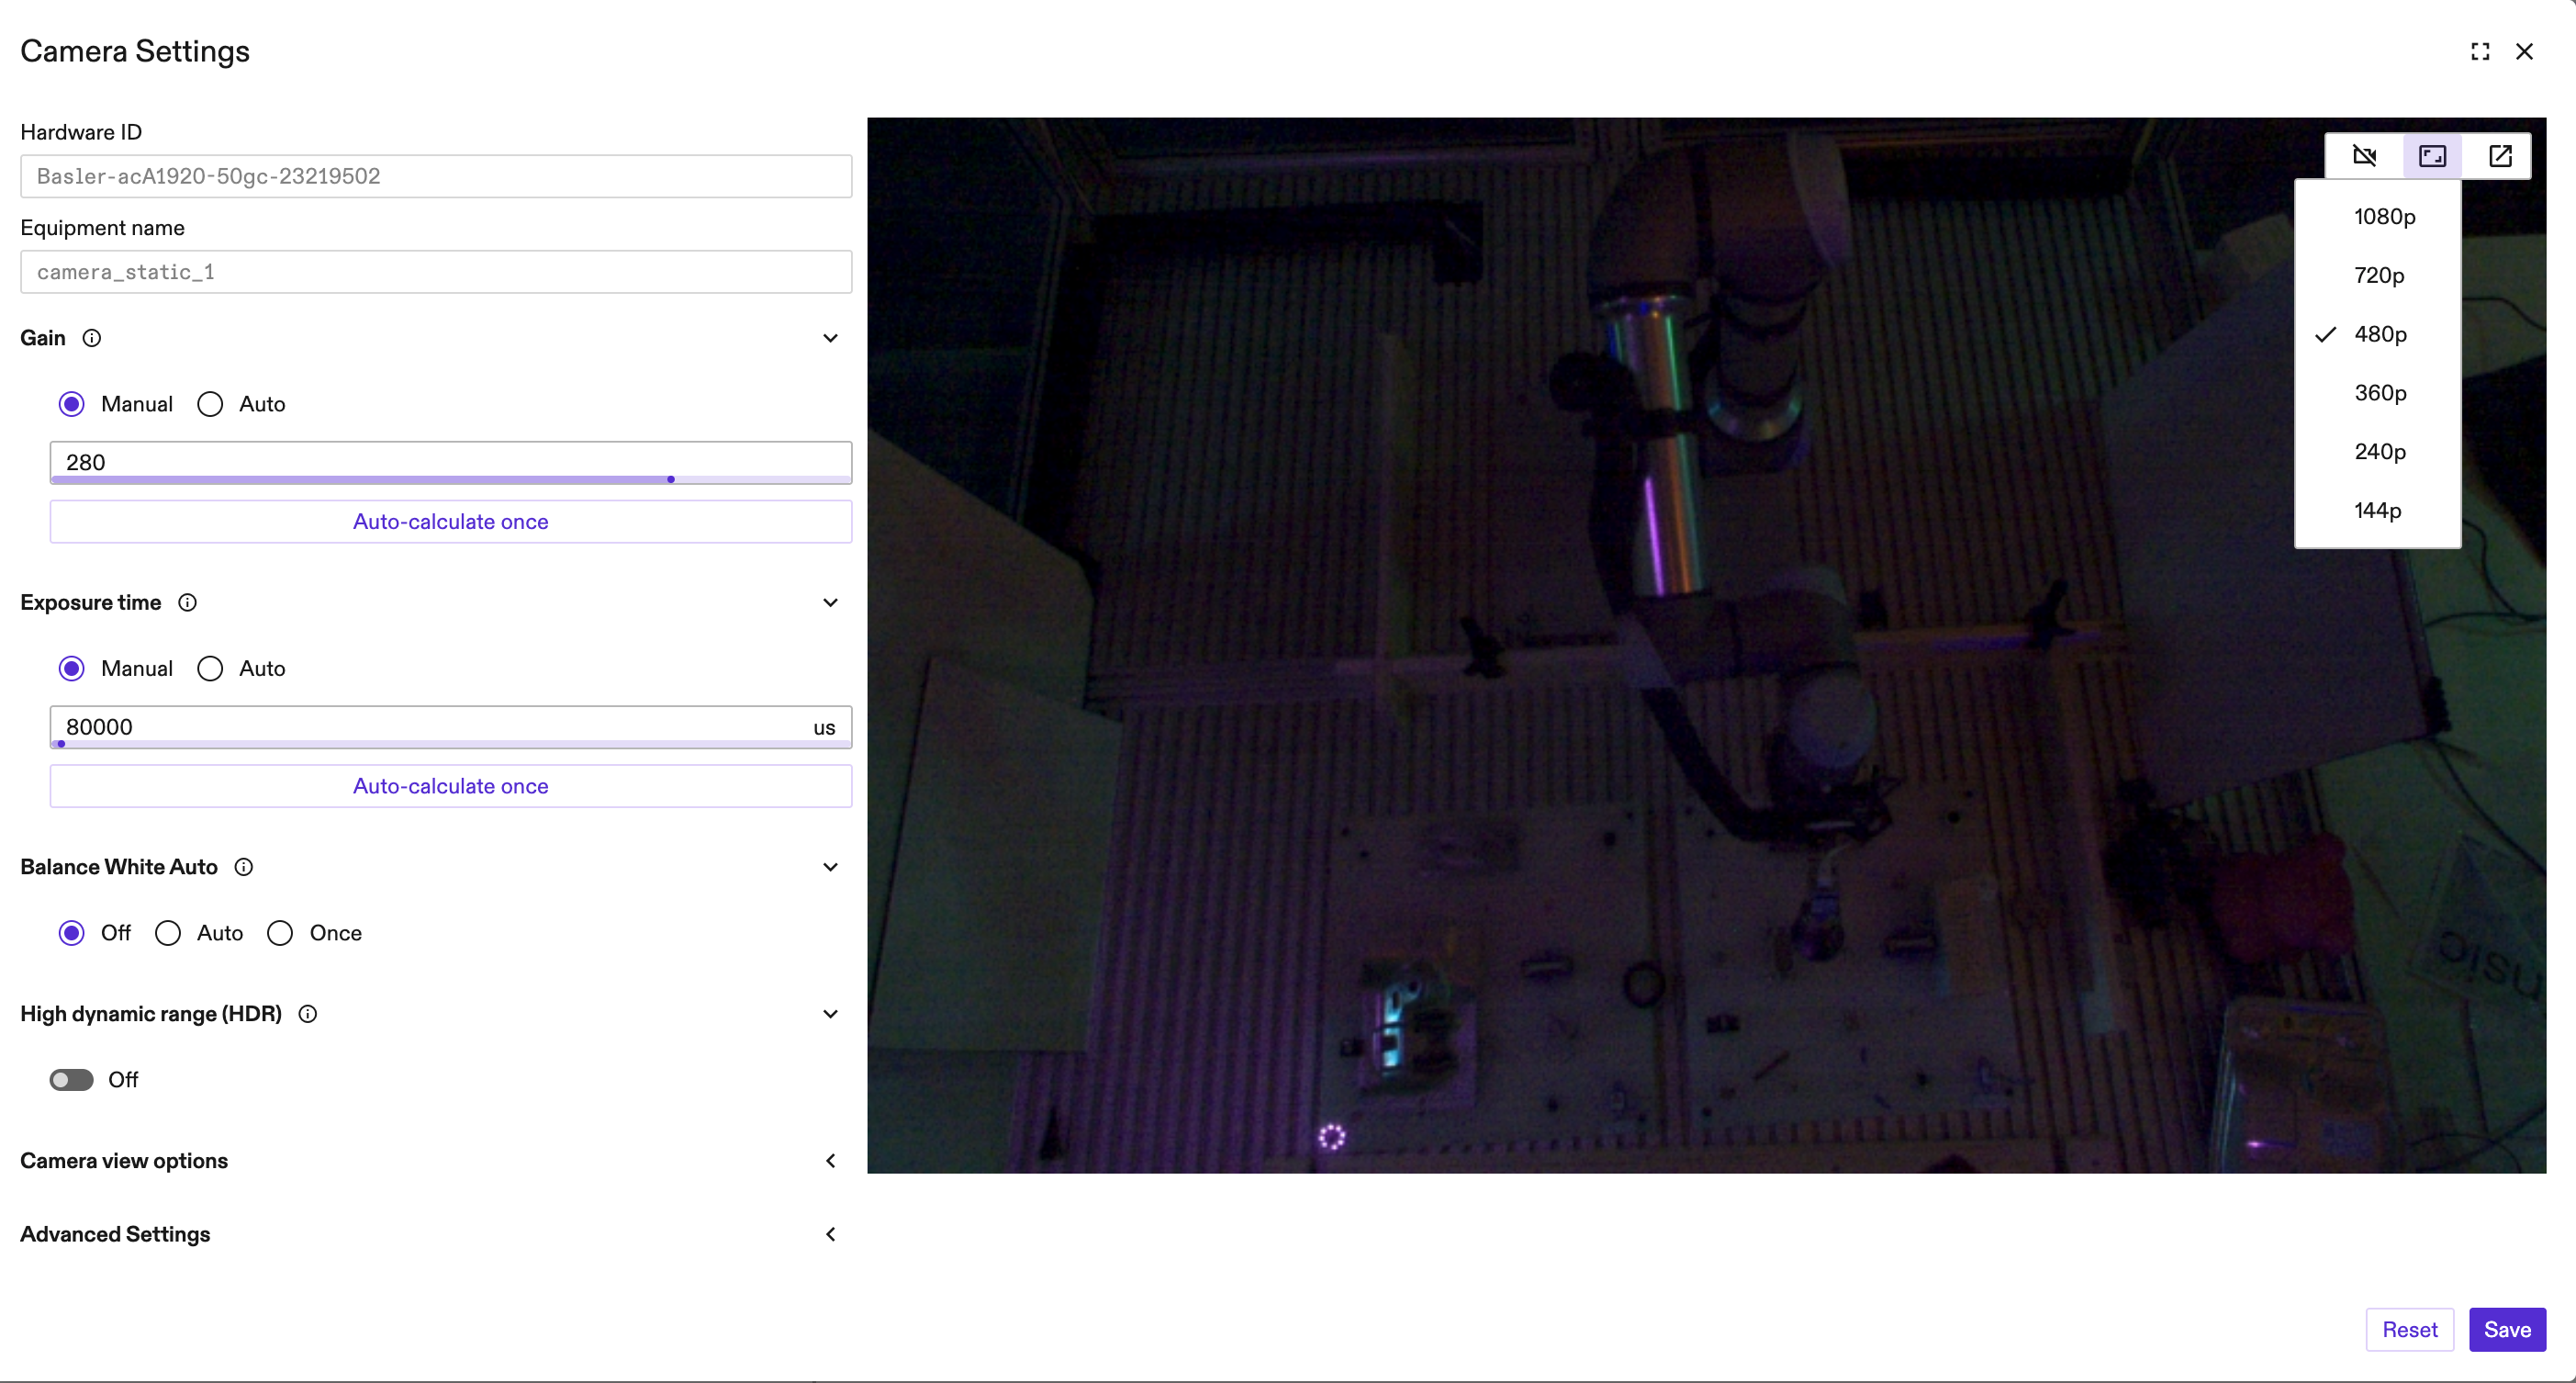
Adjust camera settings
Camera settings differ depending on the type of camera. For example, an RGB camera requires you to adjust different camera settings than a depth camera. Different types of depth cameras have different settings that can be adjusted. Refer to your camera supplier's documentation for which parameters to adjust, and set them in the Advanced settings section.
Common settings for RGB GenICam cameras
Exposure time and gain are software settings that are shown by default for RGB GenICam cameras. You can adjust exposure time and gain so that the image is neither under- nor over-exposed. If you expect frequent changes of lighting conditions, it's best to use the "Auto" setting (if supported).
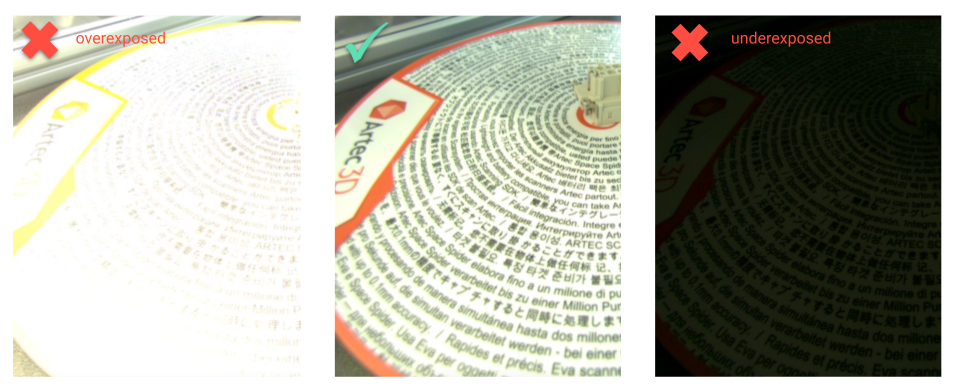
Exposure time defines how long the sensor is being exposed to light when acquiring an image. A higher exposure time produces brighter images, but the frame rate should decrease as more time is spent on acquiring each image.
Gain defines the sensitivity of the sensor. Increasing gain should brighten the image, but also add noise to it:
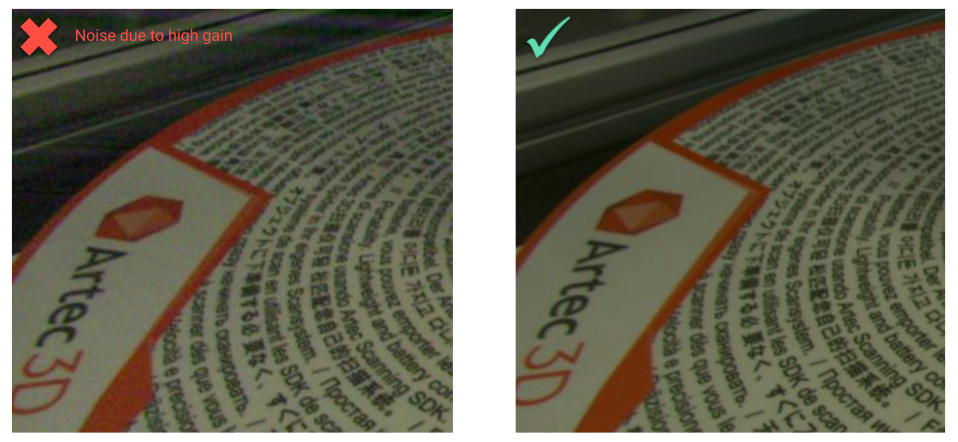
It is recommended to set exposure time and gain manually in combination with artificial light. If you are using Gain > Auto and Exposure > Auto, the image quality might differ and some vision algorithms can potentially fail.
For Advanced settings, the name of the properties should be as per GenICam standard.
When you are satisfied with the image quality, you can persist the changes by clicking Save.
Enable WebRTC Video streaming
To increase the frame rate of your live camera views.
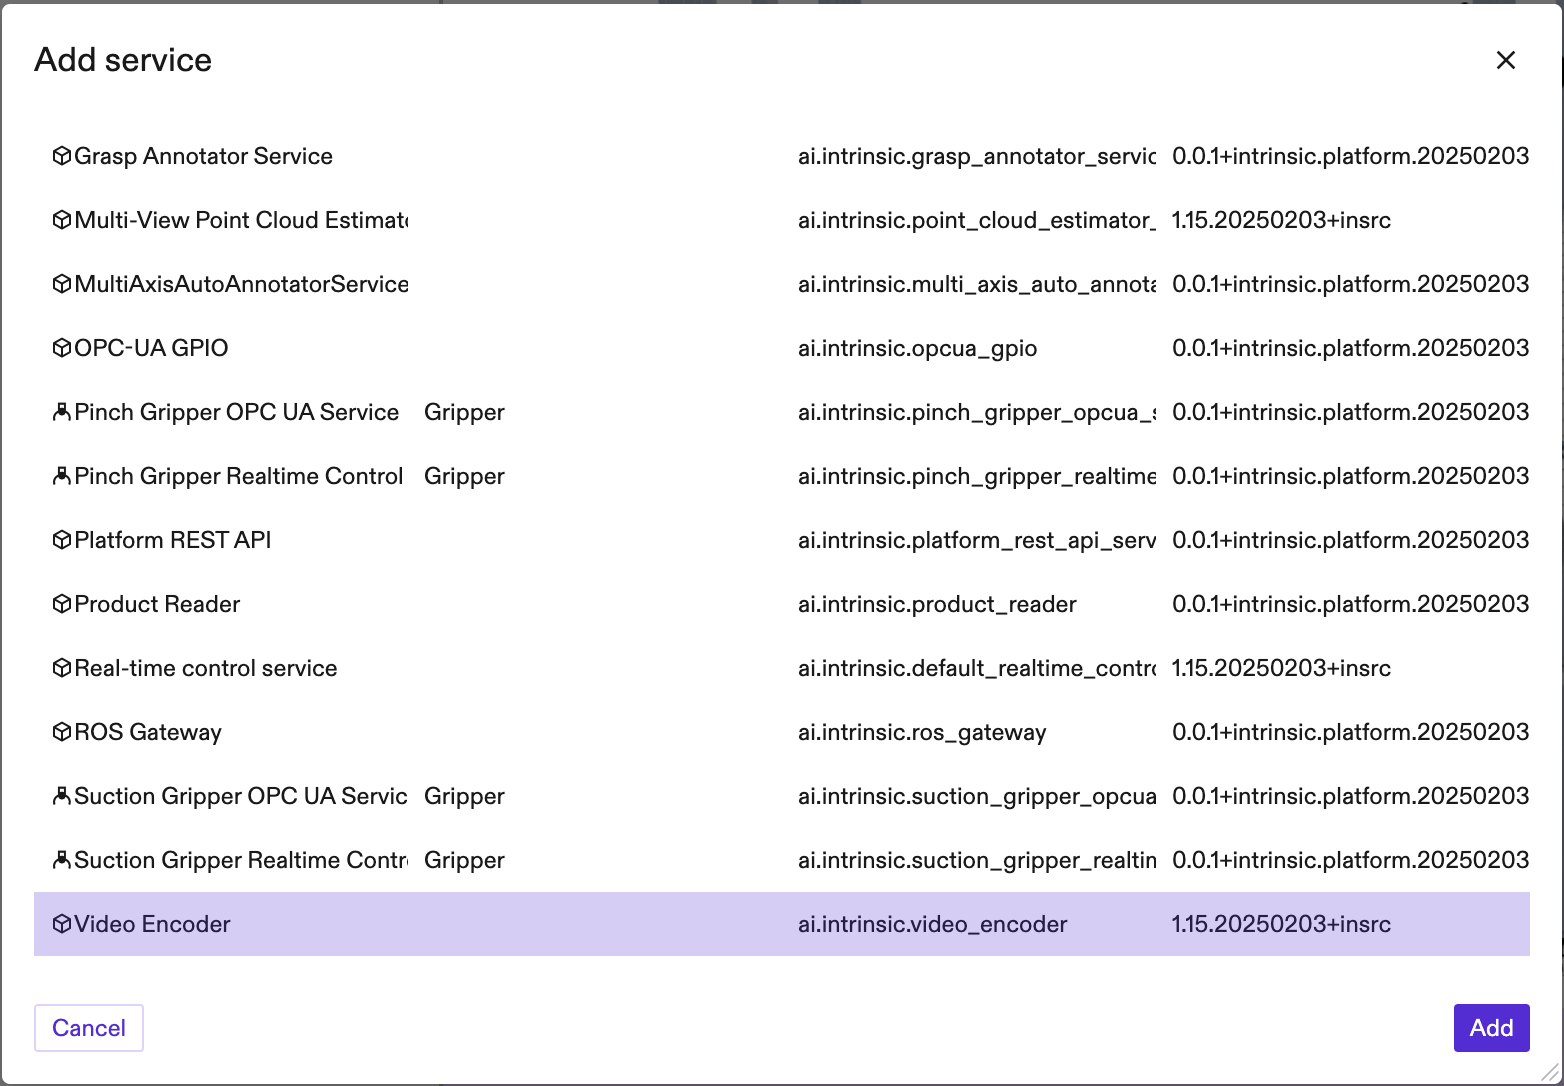
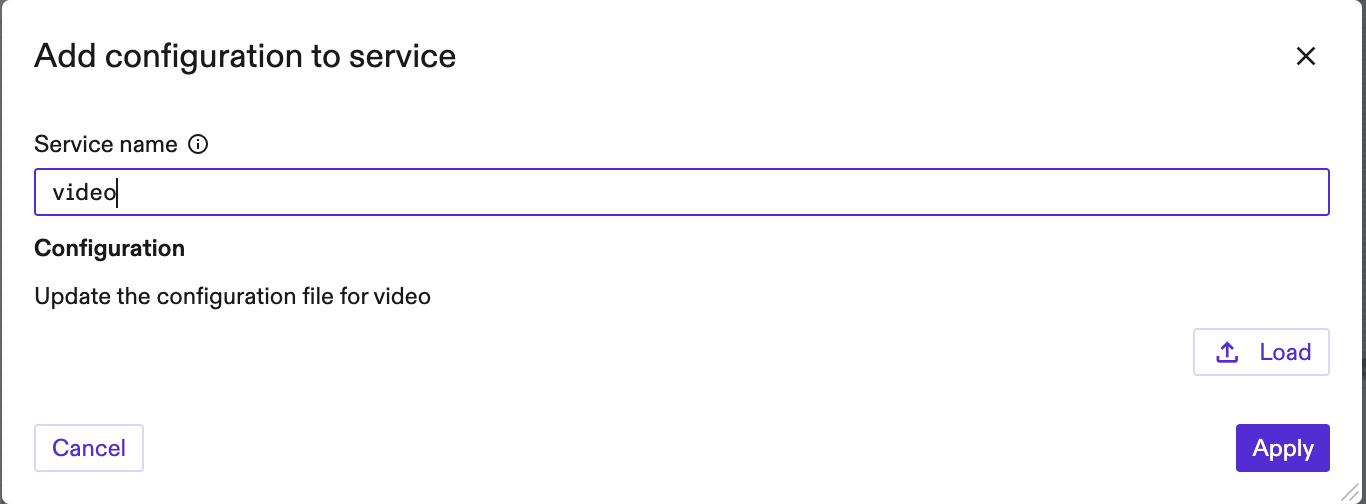
- First add a video encoding service to your solution:
Services>Add service>Catalog assets>Video Encoder>Add>Service name:video[no config needed].
- Then, reload the page and open a camera view such as the Camera settings panel.
- Finally, press the videocam button to toggle video streaming on and off.

- Note: if the exposure time is set higher than the desired fps, then video streaming will not work properly.
- To change the video resolution, press the resolution dropdown button and select a new resolution.