Camera to robot calibration
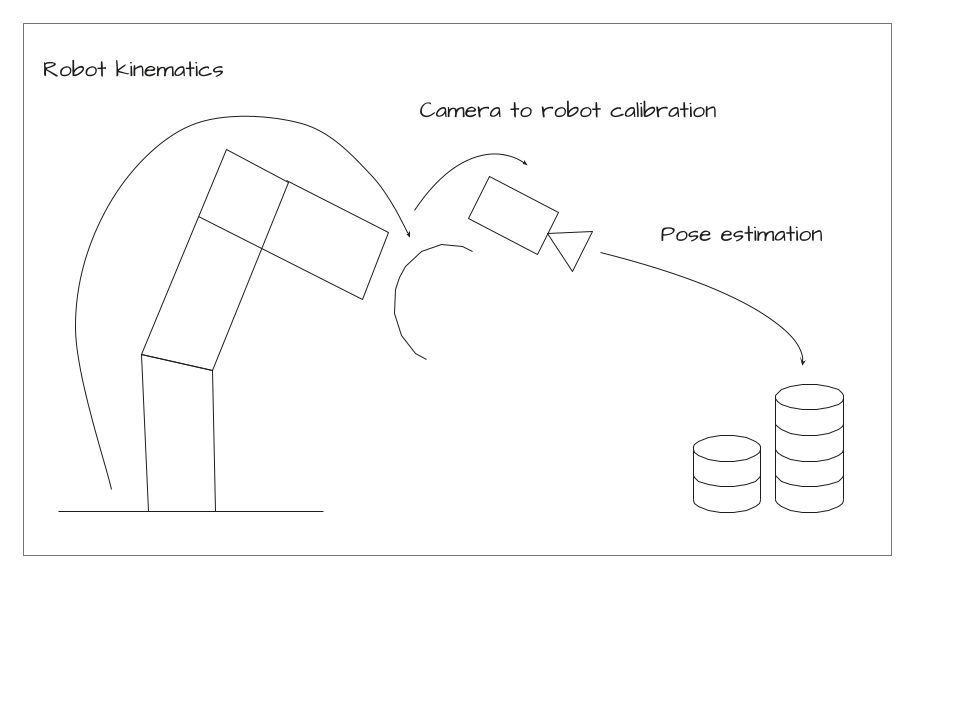
During camera to robot calibration, also called hand eye calibration, the relative position between a camera and the robot is estimated.
This is done by moving the robot to several poses, detecting a known object at each position, and then running an optimization routine to estimate the unknown (but fixed) transformations between the camera and the robot.
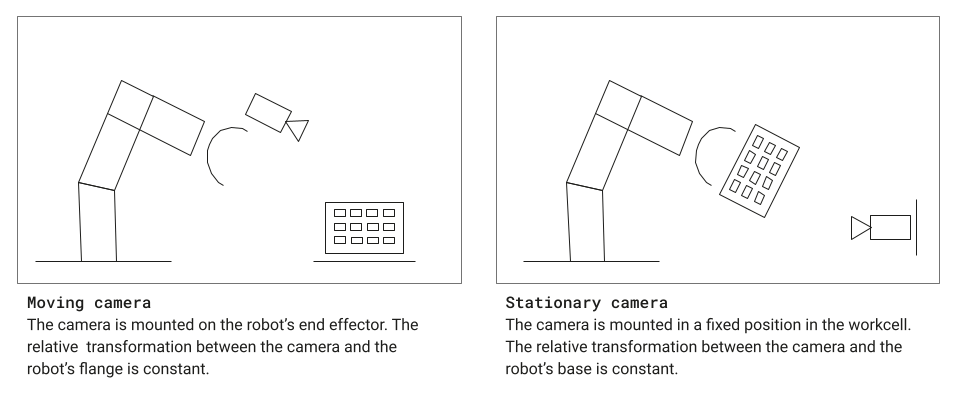
There are two different calibration cases:
- Stationary camera calibration: The camera is mounted in a fixed position in the workcell and the pattern is mounted on the robot's end effector. The calibration pattern should be mounted tightly to the robot's end effector, as it should not change during calibration.
- Moving camera calibration: The camera is mounted on the end effector and the calibration pattern is placed in a static position in the cell. The calibration pattern should not be moved during the calibration run.
If the camera position has moved or the physical camera properties, like the focus, are changed, the cell has to be recalibrated.
Calibration process overview
- Place the calibration pattern in your workcell. For moving camera calibration, place it on the workbench. For stationary camera calibration, the pattern has to be attached tightly to the robot's gripper.
- Jog the robot to a suitable starting position from where the pattern is visible, in focus and roughly in the middle of the image.
- Configure the parameters for the camera to robot calibration procedure and run it.
- Check the results. If you are not satisfied with the results, re-run the calibration procedure with a different set of parameters. If you are satisfied with the results of the calibration, save the new camera pose to the world. This will update the camera pose in the Initial world.
Achieve high quality calibration results
- We recommend using between 30 and 50 sample poses.
- The calibration poses should cover the working volume well:
- Use a sample box half size of 20cm or more if your workcell allows this (Note: for moving camera calibration, this value has to be lower usually to make sure the pattern stays in focus for all sampled poses).
- Use a rotation randomization angle of 15° or higher.
- Use a rotation randomization roll angle of 90° or higher (if possible in your workcell).
Prerequisites
- A solution is running on the physical workcell.
- The solution includes at least one robot and one camera.
- The camera has an updated intrinsic calibration
- A calibration board and corresponding pose estimator are configured for the workcell.
- The skills
update_robot_joint_positions,move_robot,estimate_and_update_pose,sample_calibration_poses,collect_calibration_data, andcalibrate_hand_eyeare installed.
We recommend using a professionally printed calibration board. A ChArUco calibration marker can be purchased for example at calib.io. More information on recommended patterns can be found in our hardware documentation. You can install a pre-configured pose estimator using the Assets catalog for the patterns from calib.io. You can also generate a PDF file to print the marker yourself at calib.io; however, a self-printed pattern will be less accurate and produce worse calibration results.
Open the camera to robot calibration panel
-
With your application open in Flowstate, navigate to the Scene Panel on the right side.
-
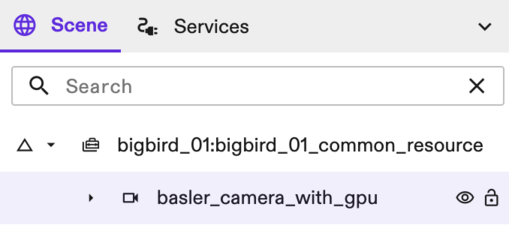
Select your camera in the Scene tree.
- In the Properties panel on the left side of the screen, under Settings, select the Camera-robot calibration option.
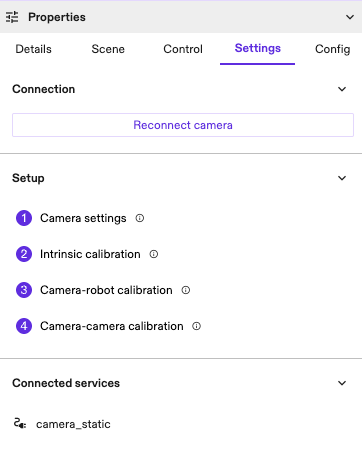
The camera to robot calibration dialog opens.
Step 1: Select equipment, world objects, and pose estimator
- Specify whether you are using a moving or stationary camera.
- Select the calibration pattern object from the world, as its geometry is used for collision checking. If you wish to use a calibration pattern object that is not yet installed to your solution, click on + Add calibration pattern from catalog in the drop-down menu to download a pattern from the Assets catalog.
- Select the pose estimator that can detect your calibration pattern from the drop-down menu. To install a new pose estimator from the Assets catalog to your solution, click on + Add pose estimator from catalog"** in the drop-down menu.
- Select the robot and camera equipment for calibration using the drop-down menus.
Step 2: Prepare the workcell
Follow the steps in the dialog to prepare your workcell for camera to robot calibration. Expand each item by clicking on it for more information.
Step 3: Jog the robot to a start position
Jog the robot to a start position from where the calibration pattern is visible in the camera view and roughly centered in the image. You can click Robot Control Frontend to jog the robot to a suitable position. Some solutions already have a calibration start pose defined.
Step 4: Configure parameters
There are two ways to define the trajectory that the robot will follow to capture frames for calibration:
- Manual waypoints: You manually jog the robot through the robot's Control panel to various positions (waypoints) and click on Save current position for each one of them. You need to define at least four waypoints. The Advanced parameters enable fine-grain control of the manual waypoint selection by allowing to disable collision checking, resetting of the robot to its base position after each transition, etc.
- Automatically sampled waypoints: You let the robot positions be auto-sampled within a bounding box that is defined through various parameters. You can hover over the tooltip pointer to get more information on each parameter.
Selecting manual waypoints enables a deterministic repetition of the calibration process since the same waypoints can be re-used if the calibration process is saved (see more about saving the process in Step 5). It also allows full control of the waypoint selection, which may be helpful in case of limited or congested working volumes, where path planning is challenging due to frequent collisions. On the other hand, auto-sampled waypoints offers a more convenient and time-efficient way to perform camera to robot calibration with a large number of poses.
Once the calibration parameters—whether via manual waypoints or sampling box configuration—click on the Calibrate button to start the calibration run.
Step 5: Perform the calibration
- Wait until the calibration is complete. Depending on how many poses are sampled, this can take several minutes.
- If the calibration is successful, check and resolve any errors. The mean translation error is expected to be below 1mm and the mean rotation error is well below 1 degree, ideally around 0.1 degrees.
- If you are satisfied with the results, click Save and next. This will update the camera pose in the Initial world.
(Optional) Save calibration process for later use, e.g., through an HMI
If you wish to run the calibration process for the same camera-robot pair and with the same calibration parameters at a later time, you can save the corresponding behavior tree by clicking Save calibration tree and providing a unique name for it. This saves the behavior tree with all required skills for calibration to your solution. It can be loaded later on into the Process Editor or through an HMI service and be triggered in order to repeat the calibration process. Subsequent executions of the behavior tree will use the same calibration parameters with new samples, therefore they will yield different results.
For an example on how to trigger such a process
from an HMI, please refer to the HMI sample service
and related documentation.
If you run calibration through an HMI, also note that the camera pose will
be updated in the Execute world and the update will not be automatically
reflected in the Initial world. If you wish to transfer the new camera pose
into the Initial world, you can call the SyncObject
rpc from the Intrinsic SDK
in your HMI service.
Step 6: Clean up the workcell
Follow the steps in the dialog to restore your workcell after camera to robot calibration. Expand each item by clicking on it for more information.