Connect a camera
This section describes how to wire your camera up correctly and how to connect to the corresponding device in Flowstate.
Camera wiring
Simple camera wiring for low resolution cameras
If you are dealing with cameras of 2 megapixel resolution and don't want to access multiple cameras at once, the simple wiring is sufficient. You will need to ensure that the cameras are set up to get an IP address via DHCP. Connect the IPC uplink and camera to an Ethernet switch. If the camera supports Power over Ethernet (PoE), consider using a PoE switch to power it and reduce cabling. Otherwise, supply power to the camera according to the instruction manual.

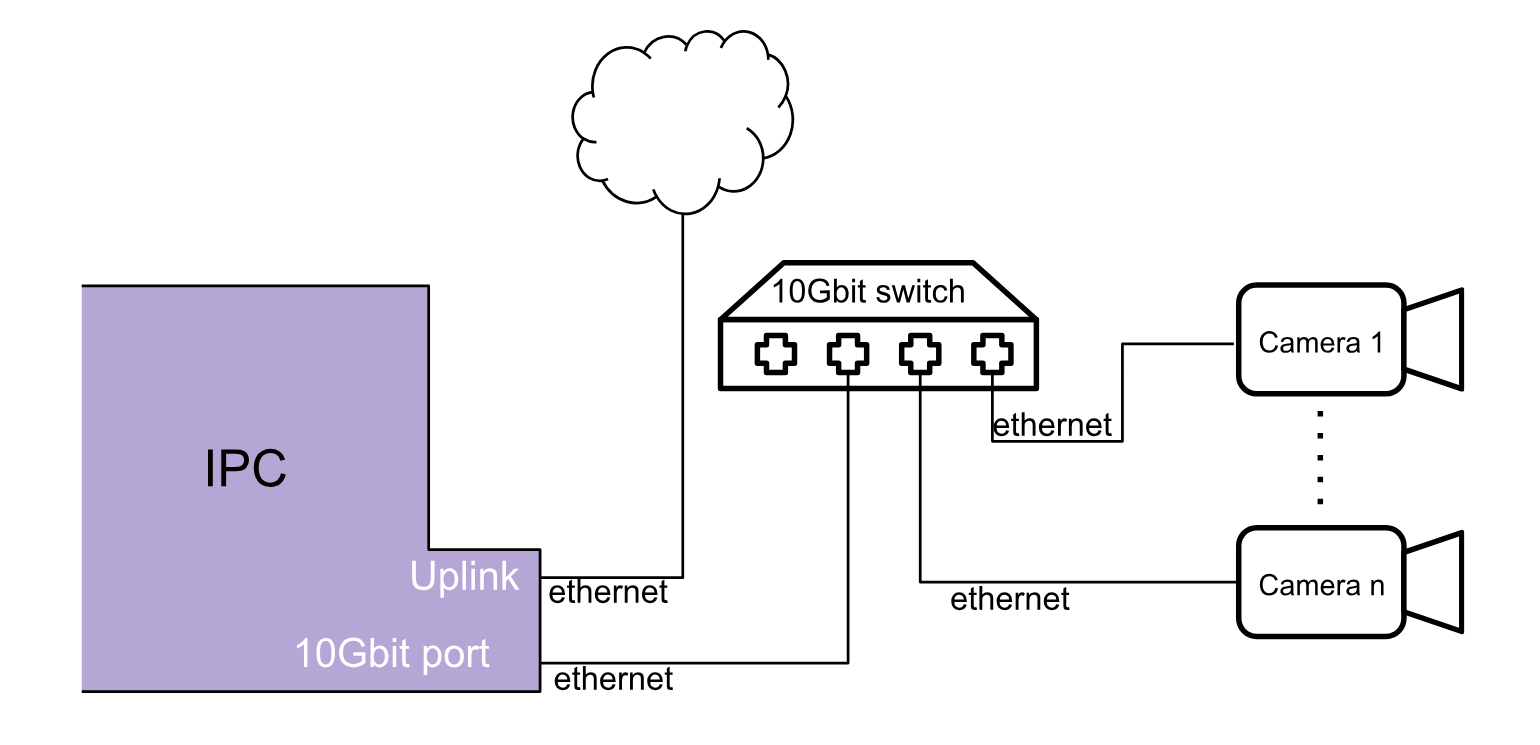
Camera wiring via separate port and 10 Gbit/s switch
This is for the cases that need more bandwidth. For example when dealing with high-resolution cameras, high frame rates and when you want to do multi-camera pose estimation. In this case we recommend using a separate port on your IPC with a 10 Gbit/s network controller. Combine this with a 2.5 Gbit/s or 10 Gbit/s PoE switch which has at least a 10 Gbit/s uplink to the IPC. The wiring then looks like this:
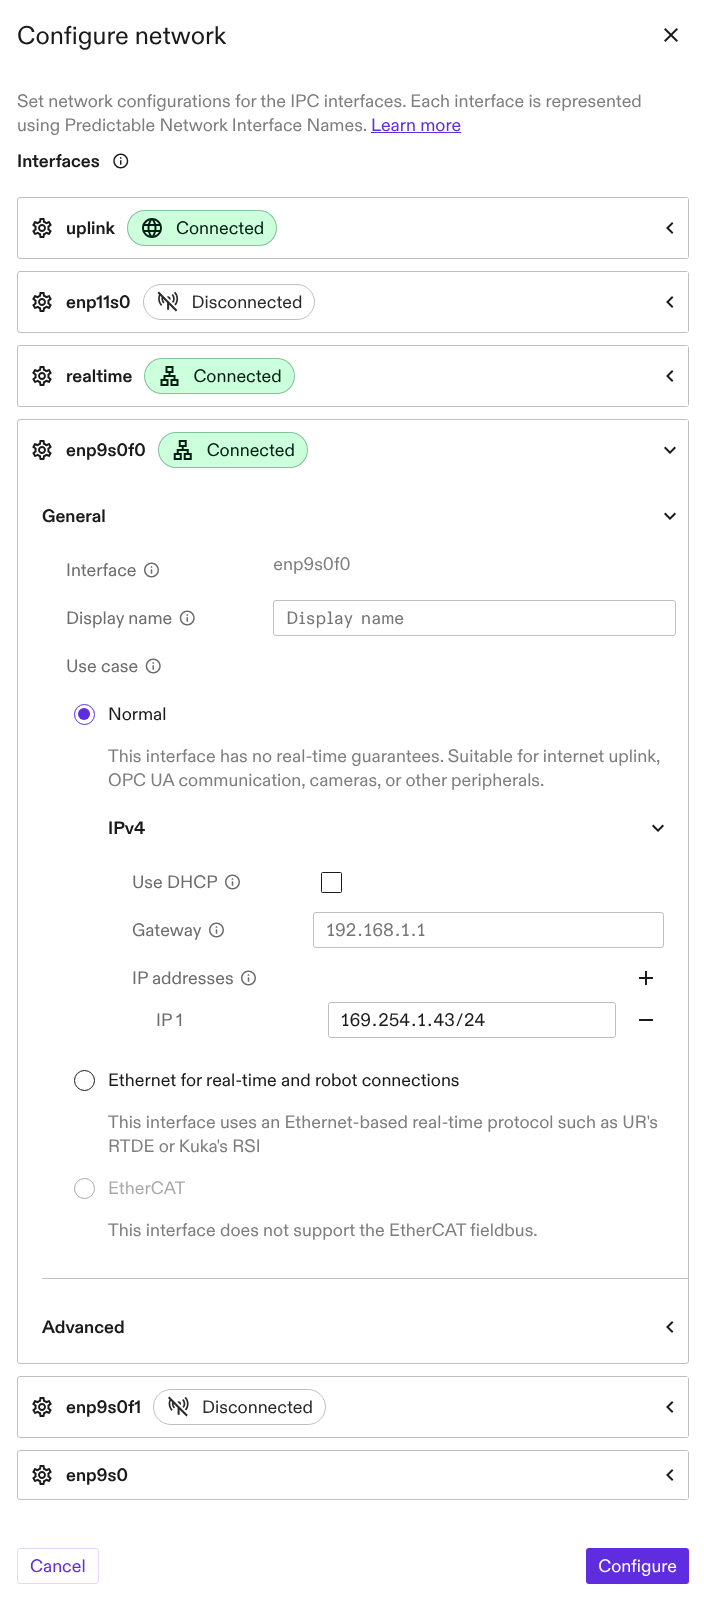
In this case the IPC won't act as DHCP server so there will be no DHCP server in this subnet. But this is not an issue as most cameras support IPv4 LL where they self-assign IP addresses in the 169.x.x.x range. To ensure the IPC is in the same range you must disable DHCP on that interface and have the settings as shown here:
Connect the physical camera to its digital twin
To perform the next steps, your application needs to be in real hardware mode. To configure your camera on real hardware, leverage the top app bar drop-down to switch into real hardware mode.
You must install a specific driver before using ROS-based cameras such as the Intrinsic Plenoptic System (IPS). For example, to add the IPS driver service to your solution, go to Services > Add service > Catalog assets > IPS Driver > Add > Service name: ips [no config needed].
Then, add an existing camera hardware asset to your solution through the catalog. For example, to add an IPS asset, go to + > Add to scene > Catalog assets > intrinsic_plenoptic_unit > Instance name: plenoptic_unit.
Alternatively, if your solution does not have a camera yet, add the camera hardware asset.
Now follow these steps:
-
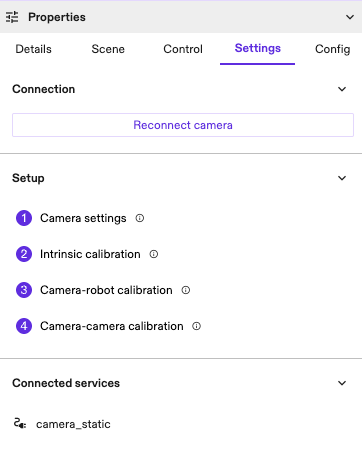
To establish a connection between your physical camera and the corresponding digital twin camera, go the Settings tab in the Properties panel of your camera.
-
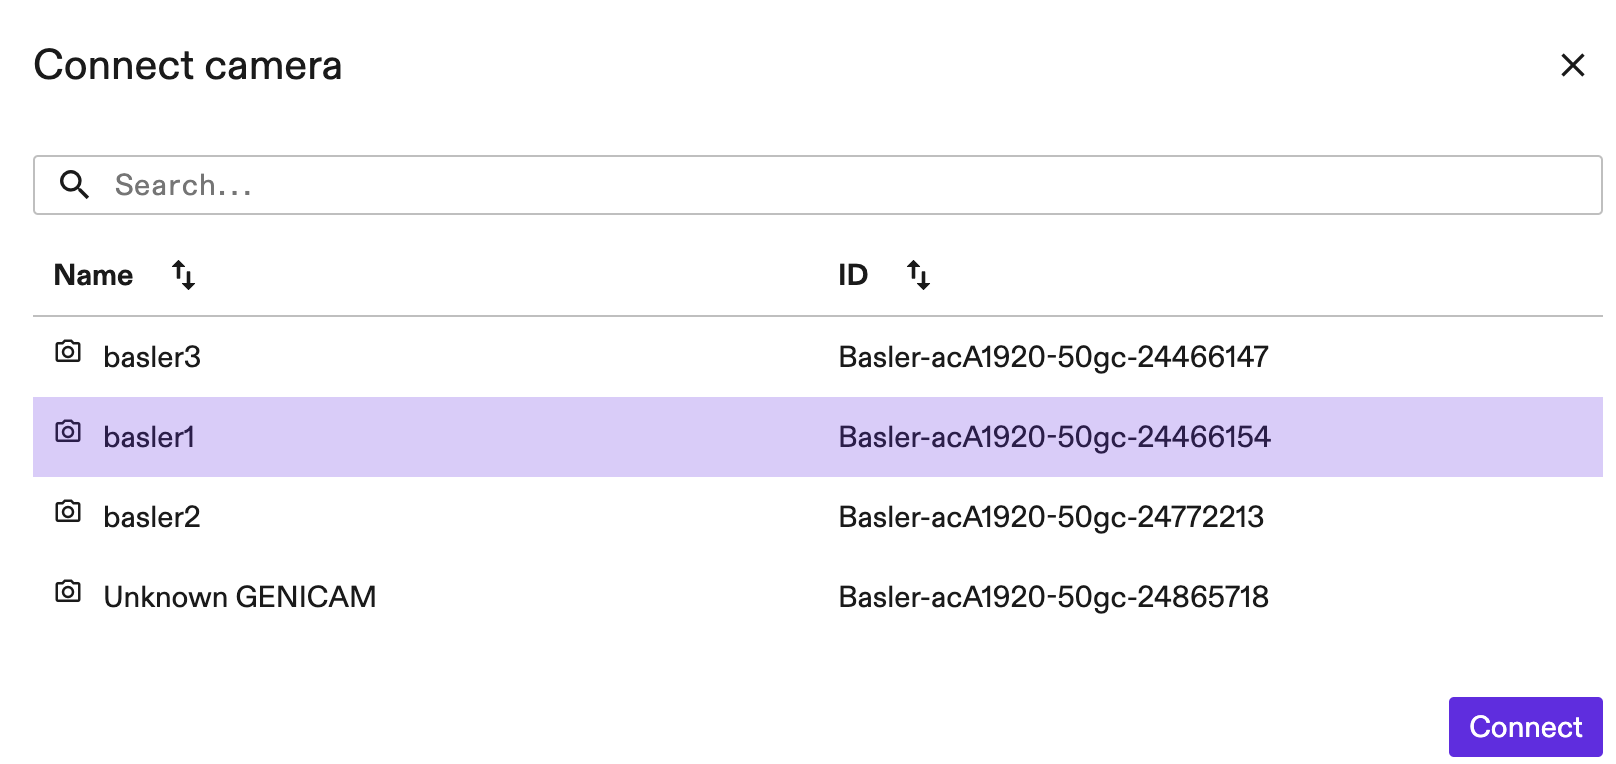
Next, go to the Connection section and click the Connect camera or Reconnect camera button to open the dialog listing all physically connected cameras. Select the hardware identifier corresponding to the camera and then click Connect.
 tip
tipTake note of the hardware identifier when plugging in the physical camera; it can help to have this dialog open to view the differences.